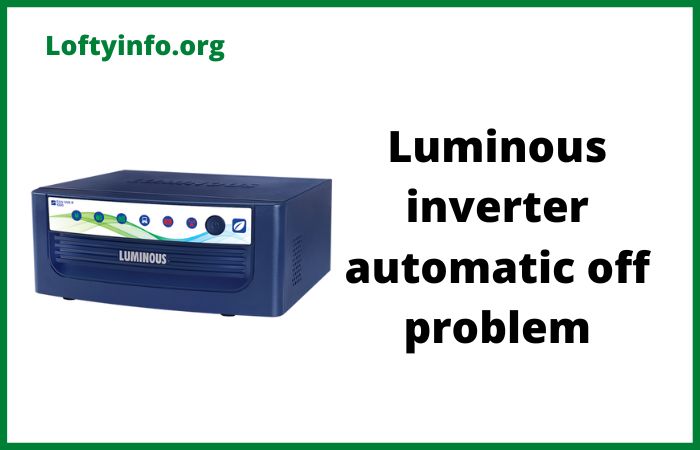
Luminous Inverter Automatic Off Problem Causes And Solutions
Power backup systems have become essential components in modern homes and businesses, particularly in regions experiencing frequent electricity disruptions.
Luminous inverters stand among the most trusted brands in the power backup industry, providing reliable electricity supply during outages.
Despite their reputation for quality and durability, these inverters can experience automatic shutdown issues that leave users frustrated and without power when they need it most.
Understanding why your Luminous inverter keeps turning off automatically and knowing how to resolve these problems can save you time, money and the inconvenience of unexpected power loss.
The automatic shutdown feature in Luminous inverters is actually a protective mechanism designed to prevent damage to the unit and connected appliances.
When the inverter detects certain fault conditions, it automatically powers down to protect its internal components and your electrical devices.
While this safety feature is beneficial, frequent automatic shutdowns indicate underlying problems that require immediate attention.
This comprehensive guide explores the most common causes of Luminous inverter automatic off problems and provides detailed solutions with step-by-step troubleshooting procedures.
Causes Of Luminous Inverter Automatic Off Problem
1) Battery Voltage Issues and Deep Discharge Protection
One of the primary reasons your Luminous inverter shuts down automatically relates to battery voltage problems.
Luminous inverters are programmed with specific voltage thresholds to protect the battery from damage caused by excessive discharge.
When the battery voltage drops to approximately 10.8 volts, the inverter automatically shuts down to prevent deep discharge that could permanently damage the battery cells.
This protective shutdown is accompanied by continuous beeping sounds that alert you to the low battery condition.
The root causes of battery voltage issues extend beyond simple power depletion.
Aging batteries lose their capacity to hold charge over time, resulting in faster discharge rates and premature shutdowns.
A battery that once provided 4-5 hours of backup may only deliver 1-2 hours as it ages. Sulfation, a process where lead sulfate crystals accumulate on the battery plates, reduces the effective surface area available for chemical reactions and diminishes overall capacity. Poor connections at the battery terminals also contribute to voltage problems.
Loose or corroded terminals create resistance in the electrical path, causing voltage drops that trigger the low voltage protection even when the battery has sufficient charge.
To troubleshoot battery voltage issues, begin by checking the battery charge level using a multimeter. With the inverter turned off and no load connected, measure the voltage across the battery terminals.
A fully charged 12-volt battery should read between 12.6 and 13.2 volts.
If the reading falls below 12 volts, the battery requires charging. Inspect the battery terminals carefully for any signs of corrosion, which appears as a white or greenish powdery substance around the connection points.
Remove the terminal connections and clean both the battery posts and cable clamps using a wire brush or sandpaper. After cleaning, apply a thin layer of petroleum jelly or terminal protection spray to prevent future corrosion.
Ensure all connections are tight and secure.
If the battery consistently fails to hold charge or discharges rapidly despite proper charging, it may have reached the end of its useful life.
Most inverter batteries last between 3 to 5 years depending on usage patterns and maintenance. Testing the battery with a load tester or hydrometer can help determine its condition. When replacing batteries, always choose the correct capacity recommended by Luminous for your inverter model. Installing an undersized battery will result in insufficient backup time and frequent shutdowns. After installing a new battery, allow it to complete a full charge cycle before putting it into service.
2) Overload Condition and Excessive Power Draw
Overload represents another common cause of automatic inverter shutdown. Every Luminous inverter has a specific power rating measured in volt-amperes or watts that indicates the maximum load it can handle. When the total power consumption of connected appliances exceeds this rated capacity, the inverter enters overload protection mode.
The unit typically emits a distinct beeping sound as a warning before shutting down completely.
This protection mechanism prevents damage to the inverter’s power electronics and prevents overheating that could lead to component failure or fire hazards.
Several factors contribute to overload conditions.
The most obvious cause is connecting too many appliances simultaneously. Many users underestimate the collective power requirements of their devices.
A single refrigerator can draw 150-300 watts continuously but requires 3-4 times that amount during compressor startup. Adding lights, fans, televisions and other electronics can quickly exceed the inverter’s capacity.
Some appliances have high inrush currents during startup that momentarily create overload conditions even if their running power consumption is within limits. Motors, compressors and fluorescent lights are particularly notorious for high startup currents.
Faulty appliances with internal short circuits or failing components may also draw excessive current, triggering overload protection.
To resolve overload problems, start by calculating the total power requirements of all devices you plan to connect to the inverter.
Check the nameplate or specifications label on each appliance to find its wattage or current rating. Add these values together and ensure the total stays below 80% of your inverter’s rated capacity to provide a safety margin. If the total load exceeds this threshold, you must reduce the number of connected devices.
Prioritize essential appliances like lights, fans and critical electronics while disconnecting heavy-load items such as water heaters, electric kettles, irons or air conditioners during inverter operation.
When troubleshooting persistent overload shutdowns with seemingly appropriate loads, examine each connected appliance individually. Disconnect all devices from the inverter and then reconnect them one at a time while monitoring the inverter’s display or listening for alarm sounds.
This systematic approach helps identify problematic appliances that may be drawing excessive current due to internal faults.
Pay special attention to older appliances with motors or heating elements as these are more prone to developing electrical problems. Replace or repair any faulty devices to prevent repeated overload conditions.
Consider upgrading to a higher capacity inverter if your power requirements legitimately exceed your current unit’s rating.
3) Overheating and Cooling System Failures
Thermal protection mechanisms in Luminous inverters automatically shut down the unit when internal temperatures exceed safe operating limits. Modern inverters generate substantial heat during operation, particularly when powering heavy loads.
The power conversion process from DC battery voltage to AC household voltage is not perfectly efficient, and the lost energy manifests as heat within the inverter’s electronic components.
Prolonged exposure to excessive heat accelerates component degradation, reduces efficiency and can lead to permanent failure. Therefore, the thermal shutdown feature serves as a crucial safety mechanism.
Multiple factors can cause overheating problems in inverters. Poor ventilation around the inverter cabinet is perhaps the most common cause. Installing the inverter in enclosed spaces, against walls without clearance or in locations with restricted airflow prevents proper heat dissipation.
Direct sunlight exposure on inverters mounted outdoors significantly increases ambient temperature and heat absorption. The internal cooling fan, which actively circulates air through the inverter to dissipate heat, can fail due to dust accumulation, bearing wear or electrical faults.
When the cooling fan stops working or operates inefficiently, internal temperatures rise rapidly under load, triggering thermal protection.
Dust and debris accumulation on heat sinks and internal components acts as insulation, trapping heat and reducing cooling efficiency.
Troubleshooting overheating issues begins with environmental assessment. Check the location where your inverter is installed and ensure adequate space exists on all sides for air circulation.
Luminous recommends maintaining at least 6 inches of clearance on all sides of the inverter. If the unit is installed in a cabinet or enclosed space, ensure the enclosure has ventilation openings that allow free air movement.
Relocate inverters installed in direct sunlight to shaded areas or install protective covers that block sun exposure while maintaining ventilation.
Listen carefully for the cooling fan operation when the inverter is running under load. The fan should produce a steady, smooth sound. Unusual noises like grinding, clicking or complete silence indicate fan problems.
To clean the cooling system, first disconnect all power sources including AC input and battery connections following proper safety procedures. Open the inverter cabinet according to the manufacturer’s instructions.
Use a soft brush or compressed air to gently remove dust and debris from the cooling fan blades, heat sinks and internal components.
Avoid using liquid cleaners or excessive force that could damage sensitive electronics.
Pay particular attention to the fan motor and surrounding area. If the fan appears damaged or fails to operate even after cleaning, it requires replacement.
Contact Luminous service center or authorized technicians for cooling fan replacement as this involves working with internal components.
Regular cleaning every 3-6 months, depending on environmental dust levels, prevents many overheating-related shutdowns.
4) Faulty Wiring and Loose Connections
Electrical connection problems represent a frequently overlooked cause of automatic inverter shutdowns. The inverter system involves multiple connection points including AC input from the grid, DC connections to the battery bank and AC output to appliances.
Any loose, corroded or improperly connected wire can cause erratic behavior including unexpected shutdowns.
Poor connections create resistance in the electrical path, leading to voltage drops, excessive heat generation and potential arcing. These conditions trigger various protection circuits within the inverter.
Connection problems develop gradually over time. Thermal cycling, where conductors expand when hot and contract when cool, can slowly loosen terminal screws.
Vibration from fan operation or environmental factors like earthquakes can also work connections loose.
Corrosion develops on exposed copper conductors especially in humid environments, increasing resistance at connection points.
Incorrectly sized wires that are too thin for the current they carry can overheat and damage terminal connections.
Some inverters include wrong wiring detection that automatically shuts down the unit when it detects reversed polarity or unsafe wiring configurations.
To diagnose connection problems, perform a thorough visual inspection of all wiring with the power disconnected.
Start with the battery connections, which carry the highest currents in the system. Remove each cable and inspect both the cable terminal and the battery post for signs of corrosion, discoloration or damage.
Corrosion appears as white, blue or green deposits around connection points.
Clean corroded terminals with a wire brush and appropriate cleaning solution, then reconnect and tighten securely.
Use a torque wrench if specified in the manual to achieve proper tightness without over-tightening that could damage terminals.
Examine the AC input and output connections at the inverter terminals. Ensure all screws are tight and wires are properly seated in their terminals.
Check for any signs of overheating such as discolored insulation, melted plastic or burn marks near connection points.
These indicate serious connection problems that require immediate attention. Verify that wire sizes match the inverter manufacturer’s specifications.
Undersized wires create excessive voltage drop and heat generation.
If you find damaged wires or connections, replace them with appropriately sized conductors and make proper connections.
If you notice the wrong wiring indication on your inverter display, immediately disconnect power and verify that all connections match the wiring diagram provided in the manual.
Never attempt to override protection circuits as this compromises safety.
5) Battery Electrolyte Level and Maintenance Issues
For Luminous inverters using traditional lead-acid batteries rather than maintenance-free variants, electrolyte level maintenance plays a critical role in system operation.
The electrolyte, a mixture of sulfuric acid and water, facilitates the chemical reactions that store and release electrical energy in the battery.
During normal charging cycles, some water in the electrolyte evaporates through a process called gassing. As water levels decrease, the battery plates become exposed to air, dramatically reducing capacity and potentially causing permanent damage.
Inverters may shut down automatically when battery performance degrades to the point where voltage drops too quickly under load.
Low electrolyte levels cause multiple problems that can trigger automatic shutdown. Exposed battery plates cannot participate in the charging and discharging reactions, effectively reducing the battery’s capacity.
The remaining electrolyte becomes more concentrated with acid, accelerating corrosion of the plates and internal components.
Heat generation increases when the battery operates with insufficient electrolyte, as the available liquid cannot adequately dissipate heat from the chemical reactions.
This creates a cascading effect where increased temperature accelerates water loss, further dropping electrolyte levels and reducing performance.
To address electrolyte level issues, first determine if your battery requires maintenance. Check the battery label or documentation to confirm whether you have a flooded lead-acid battery or a sealed maintenance-free type.
Maintenance-free batteries have no removable caps and do not require electrolyte additions. For flooded batteries, safely remove the caps on top of each cell. Most batteries have 3 to 6 individual cells depending on voltage.
Look into each cell and observe the electrolyte level relative to the plates inside.
The liquid should cover the plates by approximately half an inch. If you can see exposed plates, the level is critically low and requires immediate attention.
Add only distilled water to low cells, never tap water or battery acid. Tap water contains minerals and impurities that contaminate the electrolyte and damage the battery.
Carefully pour distilled water into each low cell until the level reaches the indicator line or covers the plates with approximately half an inch of liquid. Avoid overfilling as the electrolyte expands during charging and could overflow.
After adding water, allow the battery to charge fully before testing the inverter operation. The charging process mixes the water with the existing electrolyte.
Check electrolyte levels monthly during regular use and add water as needed. Batteries in hot climates or those subjected to frequent deep discharges require more frequent checking as they lose water faster.
6) Internal Component Failures and Circuit Malfunctions
Sometimes automatic shutdowns occur due to genuine failures of internal inverter components. Modern inverters contain sophisticated electronic circuits including rectifiers, power transistors, capacitors, transformers and control boards.
These components operate under significant electrical and thermal stress, particularly during high-load conditions.
Over time, components can fail due to various factors including age, manufacturing defects, electrical surges or improper operating conditions.
Component failures often trigger specific protection circuits that shut down the inverter to prevent further damage or safety hazards.
Common internal failures include blown rectifiers that prevent proper battery charging, failed power transistors that cannot handle the DC to AC conversion, degraded electrolytic capacitors that lose capacity and affect voltage regulation, damaged control boards due to power surges or lightning strikes and faulty sensors that provide incorrect temperature, voltage or current readings to the control system.
When these components fail, the inverter may shut down immediately upon startup, during load transitions or after running for specific durations.
Error codes or LED indicators often provide clues about the nature of internal failures.
Diagnosing internal component failures requires technical knowledge and proper test equipment.
Begin by observing the inverter’s display panel or indicator lights during the shutdown event.
Many Luminous inverters display specific error codes that identify the problem area.
Consult the user manual to interpret error codes and understand what they indicate. Note whether the shutdown occurs under specific conditions such as during high loads, after a particular duration of operation or immediately upon startup.
These patterns help technicians identify the failing component.
If you suspect internal component failure, do not attempt repairs yourself unless you have appropriate training and experience with high-voltage electronics.
Inverters contain dangerous voltage levels even when disconnected from external power sources due to charged capacitors.
Contact Luminous authorized service center and provide them with detailed information about the problem including error codes, operating conditions when shutdown occurs and any unusual sounds or smells noticed.
Service technicians have specialized diagnostic equipment and access to genuine replacement parts.
Attempting DIY repairs on complex internal failures often causes additional damage and voids warranties.
For inverters still under warranty, component failures should be covered by the manufacturer provided the unit was operated according to specifications.
Preventive Maintenance and Best Practices
Preventing automatic shutdown problems requires consistent maintenance and proper operating practices.
Regular inspection and maintenance extend inverter life, improve reliability and reduce unexpected failures.
Establish a monthly maintenance routine that includes cleaning the inverter exterior and ensuring ventilation openings remain clear.
Check all visible connections for tightness and signs of corrosion. Inspect battery terminals and clean them if necessary.
For flooded batteries, check electrolyte levels and add distilled water as needed. Monitor battery voltage with a multimeter to detect declining performance before it causes problems.
Avoid operating the inverter beyond its rated capacity.
Calculate the total power requirement of connected appliances and maintain a safety margin below the inverter’s maximum capacity.
Disconnect non-essential loads during power outages to extend backup time and reduce stress on the system. Protect the inverter from environmental extremes by installing it in a cool, dry location away from direct sunlight, rain and excessive humidity.
Ensure adequate ventilation around the installation area. Consider installing surge protectors on the AC input line to guard against lightning strikes and voltage spikes from the grid.
Monitor backup time and battery performance regularly.
If you notice significant reductions in backup duration, investigate promptly rather than waiting for complete failure. Most battery problems are progressive and can be addressed before they cause system shutdowns.
Keep the inverter firmware updated if your model supports updates, as manufacturers sometimes release updates that improve protection algorithms and fix bugs.
Maintain records of maintenance activities, battery replacements and any problems encountered.
This documentation helps identify patterns and assists technicians in diagnosing persistent issues.
Understanding your Luminous inverter’s automatic off problems empowers you to maintain reliable backup power when you need it most.
By systematically addressing battery issues, preventing overloads, maintaining proper cooling, ensuring secure connections and performing regular maintenance, you can minimize unexpected shutdowns and extend the life of your power backup system.
When problems exceed your troubleshooting capabilities, do not hesitate to contact qualified service professionals who can safely diagnose and repair complex issues.
Proper care and attention to your inverter system provides peace of mind knowing that backup power will be available during outages.
Why Is Luminous Inverter Not Working After Power Cut
Why is inverter charging light not blinking
Causes of inverter output low voltage problem
Solution to Livguard inverter battery not charging problem
Luminous inverter low voltage problem
Causes Of Inverter Tripping Problems With Solutions
Why is luminous inverter fan not stopping
Luminous inverter charging problem