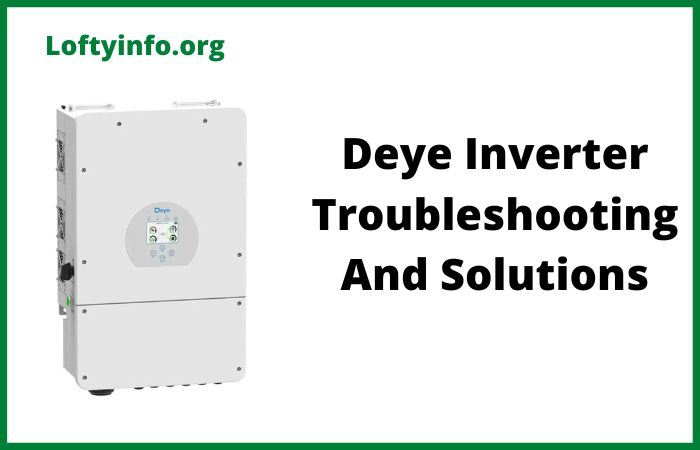
Deye Inverter Troubleshooting For Common Problems
Solar inverters are the heart of any photovoltaic system and Deye inverters have become increasingly popular among residential and commercial solar installations worldwide.
These devices convert direct current from solar panels into alternating current that powers your home or feeds back into the grid.
When your Deye inverter encounters issues it can significantly impact your energy production and cost savings.
Understanding how to identify and resolve common problems ensures your solar system operates at peak efficiency and maximizes your return on investment.
Deye Inverter Troubleshooting For Common Problems
1) No Power Output or Inverter Not Starting
One of the most frustrating issues solar system owners face is when their Deye inverter fails to start or produces no power output despite adequate sunlight.
This problem typically manifests as a completely dark display screen or an inverter that powers on briefly before shutting down immediately.
The root causes of this issue often stem from insufficient DC voltage from the solar panels.
Deye inverters require a minimum voltage threshold to initiate operation and if your panels are not generating enough power due to shading, dirt accumulation or poor weather conditions the inverter cannot start.
Another common cause involves tripped circuit breakers or blown fuses in either the DC or AC side of the system.
Loose or corroded connections at the DC input terminals can also prevent proper startup as can issues with the AC grid connection if you have a grid-tied system.
To resolve this problem start by checking the DC voltage at the inverter input terminals using a multimeter.
Compare the reading against the minimum startup voltage specified in your Deye inverter manual which typically ranges from 100 to 150 volts depending on the model.
If the voltage is too low inspect your solar panels for shading issues or physical damage and clean them if necessary.
Next examine all circuit breakers and fuses in your system replacing any that have blown and resetting tripped breakers.
Inspect all DC and AC connections for tightness and signs of corrosion then clean and tighten them as needed.
If the inverter still fails to start after these checks the internal components may have failed and you should contact a qualified technician or Deye support for further diagnosis.
2) Inverter Displaying Fault Code 03 or Grid Voltage Error
Deye inverters continuously monitor grid parameters to ensure safe operation and fault code 03 or similar grid voltage errors appear when the inverter detects voltage levels outside acceptable ranges.
This safety feature protects both your equipment and the electrical grid from damage but can prevent your system from generating power.
This fault occurs when the AC grid voltage falls below or rises above the programmed thresholds in your inverter settings.
Utility grid voltage naturally fluctuates throughout the day based on demand and your inverter must disconnect when these fluctuations become too extreme.
In some cases the problem is not actual grid instability but rather incorrect voltage settings programmed into the inverter that do not match your local grid standards. Poor connections at the AC output terminals can also cause voltage reading errors that trigger this fault.
If you have recently experienced a utility power outage or significant grid disturbance the inverter may require a reset to resume normal operation.
To fix this issue first verify the actual grid voltage using a reliable multimeter at the AC output connection point and compare it against your local utility specifications which are typically 220-240V for single-phase systems or 380-415V for three-phase systems.
If the grid voltage is within normal ranges but the inverter still shows the fault you need to adjust the voltage protection settings through the inverter menu.
Access the settings menu on your Deye inverter and navigate to the grid parameters section where you can adjust the overvoltage and undervoltage thresholds to match your local grid standards.
Be careful not to set these values too wide as this could compromise safety. If your grid voltage genuinely exceeds acceptable ranges you may need to contact your utility company to address grid quality issues.
Tighten any loose AC connections and perform a complete inverter restart by switching off the DC isolator waiting 5 minutes then switching it back on followed by the AC isolator.
3) Overheating Issues and Temperature-Related Shutdowns
Deye inverters like all electronic equipment generate heat during operation and excessive temperatures can trigger automatic shutdowns to prevent component damage.
This issue becomes particularly common during hot summer months or in installations where adequate ventilation was not considered.
The primary cause of overheating is inadequate airflow around the inverter unit. Many installers mount inverters in enclosed spaces, direct sunlight or areas with poor ventilation which prevents the natural convection cooling these units rely on.
Accumulated dust and debris blocking the cooling vents restrict airflow and force the inverter to work harder, generating even more heat.
High ambient temperatures combined with maximum power operation during peak sun hours can push the inverter beyond its thermal limits. Internal fan failures on models equipped with active cooling systems can also lead to rapid overheating.
Operating the inverter at or above its rated capacity for extended periods generates excessive heat that the cooling system cannot dissipate effectively.
The solution starts with relocating the inverter if it is installed in direct sunlight or an enclosed space. Mount the unit in a shaded, well-ventilated area with at least 30 centimeters of clearance on all sides to allow proper air circulation.
Clean the cooling vents regularly using compressed air or a soft brush to remove dust and debris buildup. If your inverter has an internal cooling fan verify that it operates when the unit is running by listening for fan noise or feeling for airflow at the vents.
A failed fan requires replacement by a qualified technician. Consider installing additional ventilation such as external fans or ventilation grilles if the installation location cannot be changed.
Reduce the inverter load if possible by checking that you have not exceeded the recommended DC input capacity or AC output rating.
For persistent overheating issues despite proper ventilation you may need to install a larger inverter model that can handle your system capacity with greater thermal margin.
4) Communication Error or Monitoring System Disconnection
Modern Deye inverters offer remote monitoring capabilities through WiFi or ethernet connections allowing you to track system performance from your smartphone or computer.
Communication errors prevent you from accessing this valuable data and can sometimes indicate deeper system issues.
Communication failures typically result from network connectivity problems.
Weak WiFi signals, incorrect network credentials or router configuration issues can prevent the inverter from establishing a stable connection.
The monitoring dongle or WiFi module that enables communication may be loose or have failed entirely. Firmware incompatibilities between the inverter and monitoring platform can also cause connection dropouts especially after software updates.
In some cases firewall settings on your router block the necessary ports for inverter communication. Physical damage to communication cables for ethernet-connected systems or interference from other electronic devices can disrupt data transmission.
Begin troubleshooting by verifying your WiFi network is functioning properly and that other devices can connect successfully.
Check the WiFi signal strength at the inverter location using your smartphone and consider installing a WiFi extender if the signal is weak.
Access the inverter communication settings and re-enter your network name and password ensuring they are correct and that you have selected the appropriate security protocol. Inspect the monitoring dongle or communication module for secure connection to the inverter and reseat it if necessary.
Update the inverter firmware and monitoring app to the latest versions available from the Deye website or app store as updates often resolve compatibility issues. Configure your router to allow communication through ports 80 and 8899 which Deye monitoring systems typically use.
If using an ethernet connection examine the cable for damage and try replacing it with a known good cable. Reset the communication module by removing it waiting 30 seconds and reconnecting it.
For persistent issues contact Deye technical support as the communication hardware may need replacement.
5) Low Power Generation or Reduced Efficiency
One of the more subtle but equally important issues is when your Deye inverter operates without obvious faults but produces significantly less power than expected based on your solar panel capacity and weather conditions.
This problem can go unnoticed for extended periods resulting in substantial energy and financial losses.
Reduced power generation stems from multiple potential causes. Dirty or shaded solar panels are among the most common culprits as even partial shading on a single panel can dramatically reduce the output of an entire string.
Aging solar panels naturally lose efficiency over time typically at a rate of 0.5-0.8% annually. Incorrect maximum power point tracking settings can prevent the inverter from extracting optimal power from your panels.
String voltage imbalances caused by failed bypass diodes, panel mismatches or differential shading force the inverter to operate at suboptimal voltage levels. DC cable losses from undersized wires or long cable runs reduce the power reaching the inverter.
Internal inverter component degradation particularly in the DC to AC conversion stage can lower overall efficiency even if the unit still operates.
To address low power generation start by thoroughly cleaning your solar panels with water and a soft brush as dust, bird droppings and environmental pollutants can reduce output by 15-25%.
Inspect your panels for shading throughout the day as the sun path changes and trim any trees or remove obstacles causing shade.
Monitor the DC voltage and current from each string using the inverter display or monitoring app and compare values between strings.
Significant differences indicate problems with specific panels or strings that require investigation.
Access the inverter advanced settings and verify the maximum power point tracking parameters are correctly configured for your panel specifications.
Calculate the expected power generation based on your system size, location and current weather conditions using tools like PVGIS or similar solar calculators then compare against actual production.
If output is more than 10% below expectations after accounting for weather and seasonal variations you may have failing panels or inverter components. Check all DC cable connections for tightness and signs of damage or corrosion.
Measure the voltage at the panels and again at the inverter input to quantify cable losses which should not exceed 2-3%.
For persistent underperformance contact a solar professional to perform detailed testing including IV curve analysis of your panels and inverter efficiency measurements.
Maintaining Your Deye Inverter for Long-Term Performance
Regular maintenance prevents many common issues before they develop into serious problems.
Schedule quarterly visual inspections of your inverter checking for unusual lights, sounds or error messages.
Keep the inverter exterior and cooling vents clean and maintain proper clearances around the unit for ventilation.
Monitor your system production daily through the Deye monitoring app and investigate any unexplained drops in output.
Annual professional inspections by a qualified solar technician ensure all electrical connections remain secure and system parameters are correctly configured.
Understanding these common Deye inverter problems and their solutions empowers you to maintain your solar investment effectively.
While some issues require professional assistance many can be resolved with basic troubleshooting skills and attention to proper installation and maintenance practices.
Your solar system represents a significant investment in clean energy and taking time to address problems promptly protects that investment while maximizing your energy independence and cost savings.
Solax inverter troubleshooting for common problems
SolarEdge inverter troubleshooting for common problems
Xantrex inverter troubleshooting for common problems
Luminous inverter troubleshooting for common problems
Luminous zelio 1100 troubleshooting
Luminous eco volt 1050 troubleshooting
Why inverters connected to grid damage easily and frequently
Magnum ms2012 inverter troubleshooting
Magnum inverter ms2812 troubleshooting guide
