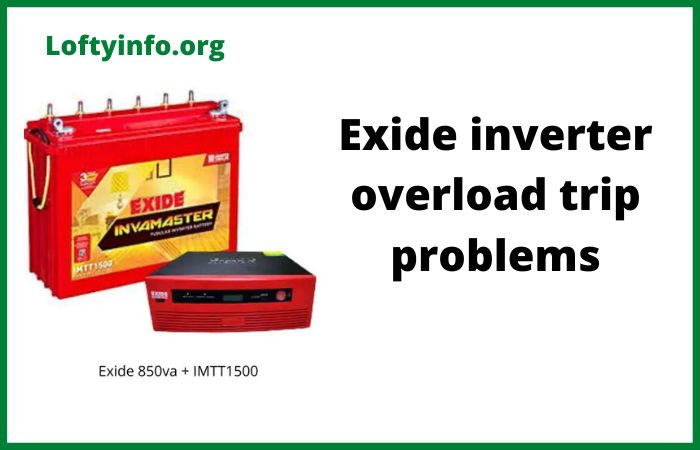
Exide Inverter Overload Trip Problems: Causes And Solutions
Exide inverters have earned their reputation as reliable power backup solutions for homes and offices across the globe.
These devices convert DC power from batteries into AC power to run household appliances during power outages.
Despite their durability and efficiency, many users encounter a frustrating issue where their Exide inverter repeatedly trips due to overload conditions.
This problem disrupts the seamless power supply you depend on and can leave you without electricity when you need it most.
An overload trip occurs when the inverter detects that the connected load exceeds its maximum capacity or when certain electrical faults trigger its protection mechanism.
While this safety feature prevents damage to both the inverter and your appliances, frequent tripping indicates underlying problems that need immediate attention.
Understanding why your Exide inverter keeps tripping and knowing how to resolve these issues will save you time, money and the inconvenience of repeated power interruptions.
Exide Inverter Overload Trip Problems Causes And Solutions
Problem 1: Excessive Load Connection Beyond Inverter Capacity
The most common reason for overload trips is connecting appliances that collectively draw more power than your inverter can handle.
Many users mistakenly assume they can run all their household devices simultaneously on their inverter without checking the total wattage requirements.
Each Exide inverter model has a specific VA rating that indicates its maximum power output capacity.
For instance, a 900VA inverter can typically handle around 720 watts of continuous load after accounting for the power factor.
The root cause lies in either lack of awareness about power consumption or gradual addition of new appliances over time.
Someone might start with basic lighting and fans but slowly add a television, refrigerator, water pump and other devices without calculating whether the inverter can support this increased demand.
The inverter’s internal circuitry monitors the output current constantly and when it exceeds safe limits the overload protection activates and shuts down the system.
To troubleshoot this issue, first calculate the total wattage of all devices you want to run on the inverter.
Check the power rating labeled on each appliance or refer to their user manuals.
Add these values together and compare the sum with your inverter’s capacity.
Remember that some devices like refrigerators, air conditioners and motors require significantly more power during startup than during normal operation.
This surge current can be 3 to 5 times higher than the running current.
The solution involves either reducing the connected load or upgrading to a higher capacity inverter.
Prioritize essential appliances during power cuts and avoid running heavy devices simultaneously.
You can create a backup plan where you manually switch off certain appliances before turning on others.
If your power requirements genuinely exceed your current inverter’s capacity, consider upgrading to a model with higher VA rating that matches your actual needs.
Exide offers various models ranging from 600VA to 3500VA for different applications.
Problem 2: Faulty or Degraded Battery Performance
A weak or failing battery can cause your Exide inverter to trip even when the connected load is well within normal limits.
Batteries degrade naturally over time due to repeated charge and discharge cycles, and their ability to deliver high current diminishes as they age.
When a battery cannot supply sufficient current to meet the load demand, the inverter perceives this as an overload condition because the voltage drops sharply under load.
This problem typically develops gradually as battery plates sulfate, electrolyte levels drop or internal connections corrode.
A battery that once supported your entire household might struggle after 3 to 4 years of regular use.
The symptoms include frequent overload trips especially when high-power devices start up, reduced backup time and the inverter switching to battery mode intermittently even when grid power is available.
To diagnose battery issues, first check the battery voltage using a multimeter when it is fully charged and disconnected from the inverter.
A healthy 12V battery should read around 12.6 to 13.2 volts when fully charged. If the reading is significantly lower, the battery has lost capacity.
Next, examine the electrolyte levels in each cell if you have a tubular or flat plate battery.
The electrolyte should cover the plates adequately and adding distilled water if levels are low is necessary.
Look for physical signs of damage like bulging cases, corrosion on terminals or cracks in the battery body.
Clean the battery terminals thoroughly using a wire brush and baking soda solution to remove any corrosion that increases resistance.
Apply petroleum jelly or specialized terminal grease after cleaning to prevent future corrosion.
The solution depends on the severity of battery degradation.
If the battery is relatively new and the issue is low electrolyte levels, topping up with distilled water and allowing a full charge cycle might restore performance.
If the battery is older than 4 years and shows signs of permanent capacity loss, replacement becomes necessary.
When replacing, ensure you select a battery with adequate Ah rating that matches or exceeds the manufacturer’s recommendation for your specific inverter model.
Exide recommends specific battery capacities for each inverter model to ensure optimal performance.
Problem 3: Wiring Issues and Poor Electrical Connections
Inadequate wiring or loose connections between the inverter, battery and household circuit create resistance that manifests as voltage drops and current fluctuations.
When current flows through a loose or undersized wire, excessive heat generates at the connection point and the inverter may interpret the resulting voltage sag as an overload situation.
This problem is particularly common in installations where users or inexperienced technicians have used incorrect wire gauges or made poor quality connections.
The underlying cause often traces back to improper installation practices.
Using wires with insufficient current carrying capacity for the inverter’s output creates a bottleneck.
Loose terminal connections at the battery or inverter gradually worsen over time due to thermal cycling and vibration.
Oxidation at connection points adds resistance that compounds the problem.
In some cases, the neutral and earth wiring in the household distribution board may have issues that affect inverter operation.
To troubleshoot wiring problems, start by inspecting all visible connections with the inverter switched off and disconnected from power.
Check the battery cable connections at both ends and ensure they are tight and free from corrosion. The cables should feel firm when you try to wiggle them gently.
Examine the wire insulation for any signs of overheating like discoloration, melting or brittleness which indicate undersized wiring.
Measure the wire gauge used for different connections and verify they meet the manufacturer’s specifications.
For most home inverters, the battery cables should be at least 4mm² to 6mm² depending on current requirements and cable length. The output wiring to your household circuits should also use appropriately sized conductors.
Use a multimeter to check for voltage drops across connections by measuring voltage at the inverter output terminals and then at the distribution point.
The solution requires correcting any wiring deficiencies you discover. Replace undersized cables with proper gauge wires recommended by Exide for your specific model.
Tighten all loose connections carefully without overtightening which can damage terminals.
Clean corroded terminals and connectors using sandpaper or a wire brush before reconnecting. Apply contact cleaner or dielectric grease to prevent future oxidation.
If you discover serious wiring issues or feel unsure about working with electrical connections, hire a qualified electrician to perform a complete inspection and remediation of your inverter installation.
Problem 4: Internal Component Failure or Circuit Board Issues
Sometimes the overload trip problem stems from faults within the inverter itself rather than external factors. Electronic components on the control board can fail due to age, voltage surges, moisture ingress or manufacturing defects.
Key components like MOSFETs, capacitors, sensors and the microcontroller that monitors load conditions may malfunction and cause false overload detection.
This situation is frustrating because the actual connected load is appropriate but the inverter incorrectly perceives an overload.
Several factors contribute to internal component degradation.
Power surges from the grid during switching operations or lightning strikes can damage sensitive electronics even if the inverter has built-in protection.
Operating the inverter in extremely hot or humid environments accelerates component aging.
Dust accumulation inside the unit can cause short circuits or interfere with heat dissipation leading to thermal stress on components.
Capacitors naturally degrade over years of operation and their failure affects the inverter’s voltage regulation and sensing circuits.
Troubleshooting internal faults requires careful observation of symptoms and some technical knowledge.
If the inverter trips immediately upon switching to battery mode regardless of connected load or trips even with minimal load, internal issues are likely.
Listen for unusual sounds like clicking relays, buzzing transformers or high-pitched whines that weren’t present before.
Check if the cooling fan operates properly since overheating can trigger protection circuits that resemble overload trips.
Examine the inverter display for error codes if your model has a digital readout.
Exide inverters often show specific fault codes that help diagnose problems.
Refer to your user manual to interpret these codes.
With the inverter disconnected from all power sources, carefully open the cabinet if you feel comfortable doing so and visually inspect for obvious damage like burnt components, swollen capacitors or loose connections on the circuit board.
The solution for internal faults typically requires professional service.
While you can clean dust buildup using compressed air and check for loose internal connections, repairing or replacing failed components needs technical expertise and specialized tools.
Contact Exide’s authorized service center in your area for proper diagnosis and repair.
Attempting DIY repairs on complex circuit boards without proper knowledge can worsen the problem and void your warranty.
If your inverter is still under warranty, internal failures should be covered by the manufacturer.
For older units beyond warranty, compare repair costs against purchasing a new inverter to make an economically sound decision.
Problem 5: Incompatible or Defective Appliances Creating Disturbances
Certain types of electrical appliances create power quality issues that trigger overload protection even when their power consumption falls within the inverter’s capacity.
Appliances with capacitive loads, motors with poor power factor or devices that draw pulsed current can confuse the inverter’s sensing circuits.
Old or defective appliances with internal short circuits or ground faults will also cause immediate overload trips when connected.
The problem occurs because inverters are designed to power resistive loads cleanly but struggle with reactive loads that cause phase shifts between voltage and current.
Appliances like old tube lights with magnetic ballasts, induction motors without proper capacitors and switching power supplies can have power factors as low as 0.5 to 0.7.
This means they draw much more current than their wattage rating suggests.
A faulty appliance with deteriorating insulation might have partial short circuits that create current spikes.
To identify problematic appliances, disconnect everything from the inverter and switch it to battery mode.
If it operates normally without tripping, reconnect appliances one at a time and observe the inverter’s behavior after each addition.
When you connect the culprit device, the inverter will trip quickly.
Pay special attention to older appliances, anything with visible damage or items that have been behaving erratically.
Test suspect appliances using a multimeter to check for ground faults.
With the appliance unplugged, measure resistance between the power plug and the metal body or case.
A low resistance reading indicates current leakage that will trip the inverter. For motors and other inductive loads, check if they have the proper capacitors connected for power factor correction.
The solution involves either replacing defective appliances or avoiding incompatible ones on your inverter. If an appliance shows signs of internal faults like ground leakage, stop using it immediately as it poses safety risks beyond just tripping your inverter.
For devices with poor power factor, you can install power factor correction capacitors if you have the technical knowledge or consult an electrician.
Consider replacing old inefficient appliances with modern equivalents that have better power quality characteristics and lower consumption.
When purchasing new devices specifically for inverter use, look for products marked as inverter-compatible or those with SMPS power supplies that handle varied input conditions better.
Best solutions to Exide inverter 850m VA overload problems
Solutions to Microtek inverter overload problems
What to do when Inverter shows overload
Luminous inverter 1650 overload problems and solutions guide
Why luminous inverter shows overload without load and how to solve it
