Common Growatt Inverter Problems With Causes And How To Troubleshoot
Growatt inverters are a popular and effective heart for many solar energy systems.
They are known for their reliability and efficiency.
Like any sophisticated piece of technology, they can sometimes display errors or run into problems.
Understanding these common Growatt inverter problems is key.
It helps you identify a simple fix or know when to call a professional.
This guide will walk you through the most frequent issues, their causes and the correct troubleshooting steps to get your system back online safely.
Common Growatt Inverter Problems
1) Inverter Has a Blank Screen and Is Not Turning On
One of the most alarming issues is finding your inverter completely lifeless.
The screen is blank and no lights are on during broad daylight.
This indicates the unit is not receiving the power it needs to even start up.
The inverter’s screen and internal logic are powered by the DC electricity from your solar panels.
The causes for this are usually straightforward.
The most common reason is that the DC isolator is in the ‘OFF’ position.
This is a safety switch located near your inverter.
Someone may have turned it off for maintenance and forgotten to turn it back on.
Another cause could be that it is very early in the morning or late in the evening.
The solar panels may not be producing enough voltage to meet the inverter’s ‘start-up’ voltage.
Less commonly, a more serious issue like a faulty string of panels, a broken DC cable or an internal inverter fault could be the culprit.
Troubleshooting for a blank screen must be done during good sunlight.
First, locate the rotary DC isolator switch on or next to your inverter.
Ensure it is turned to the ‘ON’ position.
This is the solution for most cases.
If the switch is on but the inverter remains off, you should perform a full system shutdown.
Turn off the AC breaker in your switchboard then turn off the DC isolator and wait five minutes.
Turn the DC isolator back ‘ON’ first then turn the AC breaker ‘ON’.
If the inverter still fails to start, it is time to call a qualified solar electrician. They will need to use a multimeter to check the DC voltage coming from your panels. Do not attempt to check DC voltages yourself as it is extremely dangerous.
2) The “No AC Connection” Error Message
This is one of the most common faults displayed by a Growatt inverter. It means the inverter has successfully powered up using DC power from the panels but it cannot detect the AC power from the grid.
The inverter needs to ‘see’ the grid to sync with it before it can export any power.
Your system will not produce any electricity while this error is active.
The cause is almost always on the AC side of your system.
It could be a grid-wide power outage.
Your inverter cannot connect to a grid that is not there.
The “Solar Supply Main Switch” or circuit breaker in your home’s switchboard may have tripped. This is a common occurrence.
The AC isolator, a smaller switch often located near the inverter (separate from the DC isolator) might be in the ‘OFF’ position.
In rarer cases, the AC wiring between the inverter and the switchboard could be loose or damaged.
A blown internal AC fuse inside the inverter can also cause this but that is a sign of a more serious internal failure.
To troubleshoot this, start with the simplest check.
Is the rest of your house receiving power?
If yes, the grid is fine.
Next, go to your main electrical switchboard.
Find the breaker labeled “Solar” or “Inverter”.
If it is in the ‘OFF’ position, try to reset it by pushing it back to ‘ON’.
If it trips again immediately, leave it off and call an electrician.
If it stays on, check the inverter.
If the error is gone, you have found the problem.
If the breaker was not tripped, find the AC isolator near the inverter and make sure it is also ‘ON’.
If all switches are on and you have grid power but the error persists, you will need a professional.
An electrician will need to check for voltage at the inverter’s AC terminals to diagnose the fault.
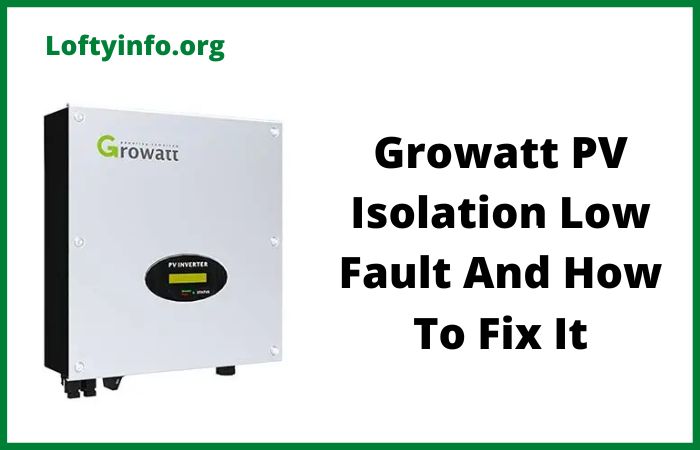
3) The “PV Isolation Low” Fault
This error indicates a serious safety issue.
“PV Isolation Low” (or “Insulation Fault”) means the inverter has detected that electricity from the DC (panel) side of your system is ‘leaking’ to the ground.
This creates a risk of electric shock and can damage the system.
The inverter will refuse to operate until this fault is cleared as a safety precaution.
This problem is very often caused by moisture.
Water is the enemy of electrical insulation.
This fault commonly appears in the morning when there is dew or after a period of heavy rain.
Water may have seeped into the DC isolator, a junction box, the conduit or even the solar panels themselves. Physical damage is another cause.
A solar panel’s backing could be cracked. A DC cable could be pinched or stripped, allowing it to make contact with the metal roof or racking.
Poor installation or aging components can also lead to insulation breakdown over time.
Troubleshooting a “PV Isolation Low” fault is not a DIY job.
This is a dangerous DC-side fault. A qualified solar technician is required.
The first step they will take is to safely shut down the system.
They will then use a specialized tool called an insulation resistance tester.
This tool checks the resistance between the positive and negative DC cables and the earth. By testing different parts of the array, they can isolate the source of the leak.
The fix could be as simple as replacing a faulty DC isolator. It could also be as complex as finding and replacing a single damaged panel or cable in the array.
Do not ignore this error even if it seems to clear itself when the weather is dry. It is a fire and safety hazard that needs to be permanently fixed.
4) AC Voltage Outrange Error
This message means the inverter is reading a grid voltage that is “out of range”. In most cases, this means the voltage is too high.
Every inverter is programmed with a safe operating window for grid voltage.
If the grid voltage exceeds this limit, the inverter must shut down to protect itself and comply with grid standards.
This is a frustrating problem as it is often not a fault with your inverter at all.
The most common cause is high voltage in your local grid.
This can happen in areas with many solar installations.
On a sunny day, all the solar systems push power back to the grid, which can raise the local voltage. If your home is at the end of a long power line, this effect can be even worse.
This is not your system’s fault. Other causes can include poor or loose AC connections.
A loose neutral wire, for example, can cause voltage fluctuations.
An incorrect “country setting” on the inverter can also cause this. The inverter might be set to a region with a different voltage tolerance.
To troubleshoot, observe when the fault happens.
Does it only occur on very sunny days around midday? This points strongly to a high grid voltage issue. You can ask an electrician to check your AC wiring.
They should ensure all connections in your switchboard and at the inverter are tight and secure.
They can also use a multimeter to measure the grid voltage at your home and compare it to the inverter’s reading. If the voltage is genuinely too high, you may need to contact your electricity utility provider.
They may be able to adjust the voltage at the local transformer. If the wiring is fine but the problem persists, a solar installer can check the inverter’s country settings.
5) The “Residual I High” Error
This is another safety-related fault, similar to “PV Isolation Low”. “Residual I High” means the inverter is detecting a high level of leakage current.
The inverter constantly compares the current in the live and neutral wires. They should be balanced. An imbalance means some current is ‘leaking’ out, likely to the earth.
This is a potential electric shock hazard.
The inverter will shut down to prevent any danger.
The causes are very similar to an isolation fault. Moisture ingress in wiring, junction boxes, or panels is a primary suspect.
Damaged cable insulation on either the AC or DC side can cause this. An incorrect grounding connection can also be a cause.
For example, if the AC ground wire was not connected properly. In some cases, it can be an internal fault with the inverter’s own leakage current detection circuit.
Troubleshooting this fault also requires a professional. You can perform a full system restart (AC and DC shutdown) to see if the fault was temporary.
If the error returns, you must call an electrician. They will need to check the entire system for insulation breakdown.
They will inspect the AC ground wire connection to ensure it is secure and correctly wired.
They will use an insulation resistance tester on both the AC and DC circuits to find the source of the leak. Attempting to run the inverter with this fault is unsafe.
6) The High PV Voltage Warning
This is a critical warning. It means the DC voltage coming from your solar panel array is exceeding the maximum voltage the inverter is designed to handle.
This is not a “fault” in the traditional sense but a serious system design error.
Running the inverter with voltage that is too high will destroy its internal components, often permanently.
The only cause for this is an incorrect system design. The solar installer has likely connected too many solar panels in a single string (in series).
The open-circuit voltage (Voc) of a solar panel increases as the temperature drops.
A string that seems fine on a warm day might exceed the inverter’s limit on a cold, sunny morning.
The installer must design the strings based on the lowest expected ambient temperature, not the average temperature.
If you see this error, you must shut down the inverter’s DC isolator immediately.
Do not turn it back on. The system is unsafe to operate. You must contact your original installer or another qualified solar company.
This is not a repair job but a design correction.
A technician will have to re-configure your solar panel strings. This usually means removing one or more panels from each string to lower the total voltage.
This is a major issue that should be rectified by the installer who designed the system.
7) Internal Faults
While many errors relate to external factors, some are genuine internal hardware failures. “Error 117” indicates a problem with an internal relay.
These are physical switches inside the inverter that connect and disconnect it from the grid. This relay has failed, and the inverter cannot operate. “Error 102” is a “Consistent Fault”.
This means the internal processors (the inverter’s “brain”) are disagreeing on data. This is a fatal internal communication error.
The cause for these errors is an internal component failure. This can happen due to age, a power surge, overheating, or just a random part failure. There is nothing externally that you can do to cause or fix this.
Troubleshooting for these errors is simple but final. You should perform a full system shutdown and restart.
This gives the inverter a chance to reset. Sometimes, a “glitch” might be cleared this way. For errors like 117 and 102, this is very unlikely to work.
If the error code returns after the restart, the inverter itself has failed. Your next step is to check your warranty. Growatt inverters typically come with a 5-year warranty, with some models having 10.
If you are within the warranty period, you can file a claim with Growatt for a replacement unit. You will need your inverter’s serial number and proof of the fault.
If the inverter is out of warranty, it will need to be replaced. Repairing the internal boards of an inverter is rarely cost-effective.
Why Some Hybrid Inverters Cannot Power Load Directly From Solar Panels