Growatt Inverter Troubleshooting: Complete Guide to Common Issues and Solutions
Solar energy systems have become increasingly popular among homeowners and businesses seeking sustainable power solutions.
Growatt inverters play a crucial role in converting DC power from solar panels into usable AC electricity for homes and the grid.
Despite their reliability and advanced technology, these inverters can occasionally experience issues that affect system performance.
Understanding how to identify and resolve common problems can save time, money and ensure your solar installation operates at peak efficiency.
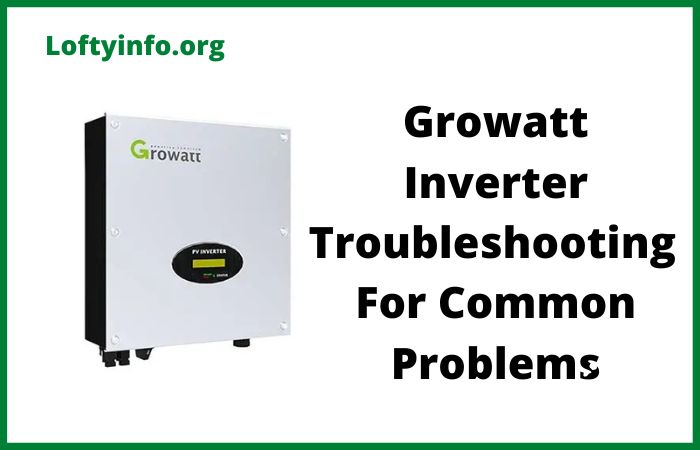
Growatt Inverter Troubleshooting For Common Problems
1) No Display or Dead Inverter Screen
One of the most alarming issues users encounter is when their Growatt inverter shows no display or appears completely dead.
The screen remains blank and there are no LED indicators showing any signs of life.
This problem can be particularly frustrating because it prevents you from accessing any diagnostic information about your system.
The primary cause of this issue is typically insufficient DC input voltage from the solar panels.
Growatt inverters require a minimum voltage threshold to power on and begin operation.
If the solar panels are not generating enough voltage due to shading, dirt accumulation or early morning/late evening conditions, the inverter will not activate.
Another common cause is a tripped circuit breaker or blown fuse in the DC disconnect switch.
Loose or corroded connections at the DC input terminals can also prevent proper power flow to the inverter.
To resolve this problem, start by checking the DC voltage from your solar array using a multimeter.
Measure the voltage at the inverter input terminals when the panels are receiving direct sunlight.
Compare this reading with the minimum startup voltage specified in your inverter’s manual, which typically ranges between 120V and 150V for most Growatt models.
If the voltage is below the threshold, inspect your panels for shading issues and clean any dirt or debris that may be blocking sunlight.
Check all DC connections for tightness and signs of corrosion, cleaning and tightening as necessary.
Examine the DC disconnect switch and any fuses to ensure they are in the on position and not damaged.
If the problem persists after these checks, the internal power supply of the inverter may be faulty and require professional servicing or replacement.
2) Inverter Shows Fault Code 24 or PV Isolation Low Error
Many Growatt inverter users encounter fault code 24 or a PV isolation low error message on their display.
This error indicates that the inverter has detected insufficient isolation resistance between the solar panel array and ground.
The inverter automatically shuts down when this fault occurs to prevent potential safety hazards.
This fault typically stems from moisture ingress in the solar panel junction boxes, damaged cable insulation or faulty PV connectors.
Heavy rain, morning dew or high humidity can create pathways for current leakage to ground. Aged or damaged cables where the insulation has cracked or worn away will also trigger this error.
Sometimes the issue occurs after installation if cables were not properly sealed or if junction boxes were not adequately waterproofed.
To fix this issue, first allow the system to dry completely if recent rain or heavy dew occurred. Wait for sunny dry conditions and check if the error clears automatically after a few hours.
If the fault persists, systematically inspect all PV cables and connectors for visible damage, paying special attention to areas where cables enter junction boxes or connect to panels. Look for cracks, cuts or exposed conductors.
Check that all junction boxes are properly sealed with gaskets intact and covers tightly secured. Use a megohm meter to test the isolation resistance between the positive and negative DC lines to ground.
The resistance should typically exceed 1 megohm. If you identify damaged cables or connectors, replace them immediately with appropriately rated components.
Ensure all connections are properly sealed with weatherproof materials. After repairs, reset the inverter and monitor for recurrence of the fault.
3) Grid Voltage or Frequency Out of Range Error
Another frequent issue with Growatt inverters is the grid voltage or frequency out of range error.
The inverter display shows fault codes related to overvoltage, undervoltage, over frequency or under frequency conditions.
When this occurs, the inverter disconnects from the grid and stops feeding power to protect both itself and the electrical system.
This problem is caused by fluctuations in the utility grid that fall outside the acceptable operating parameters programmed into the inverter.
Utility companies must maintain voltage and frequency within specific ranges, but variations can occur due to heavy loads on the grid, nearby industrial equipment, transformer issues or problems with the utility distribution system.
In some cases, the inverter settings may not match the local grid standards, particularly if the wrong country or grid code was selected during installation.
Loose connections at the AC output terminals can also cause voltage instability that triggers these faults.
To address this issue, first record the specific fault code and the grid voltage and frequency readings displayed on the inverter at the time of the fault.
Check your local grid standards to confirm the acceptable voltage and frequency ranges. In most countries, grid voltage should be around 230V plus or minus 10 percent and frequency should be 50Hz or 60Hz plus or minus a small tolerance.
Access the inverter settings menu and verify that the correct country and grid code are selected for your location. If settings are incorrect, adjust them according to your installation manual. Inspect all AC connections for tightness and proper termination.
If the fault occurs repeatedly even with correct settings and tight connections, contact your utility company to report grid instability issues.
They may need to investigate problems with their distribution equipment. You can also request a grid voltage and frequency data log from your inverter to provide to the utility company as evidence of the problem.
In rare cases, you may need to adjust the inverter’s voltage and frequency protection thresholds within allowable limits, but this should only be done by qualified technicians.
4) Inverter Showing Low or Zero Power Output
Some users notice their Growatt inverter appears to be running normally with an active display and no error codes but the power output is significantly lower than expected or shows zero watts. The inverter seems operational but is not converting the available solar energy into usable electricity at normal efficiency levels.
Several factors can cause reduced power output. Partial shading on even a small section of the solar array can dramatically reduce overall system production due to the series connection of panels.
Accumulated dirt, dust, bird droppings or leaves on the panel surfaces block sunlight and decrease generation. Aging panels naturally experience degradation in efficiency over time.
On the inverter side, failing Maximum Power Point Tracking algorithms, degraded internal components or thermal derating due to high ambient temperatures can limit output.
Sometimes the issue is simply mismatched expectations where users do not account for seasonal variations, weather conditions or the angle of sunlight.
To troubleshoot low power output, begin by checking actual weather conditions and comparing your current production to the expected output for similar conditions from your historical data.
Calculate the expected power based on your system size and current irradiance levels. Thoroughly inspect and clean all solar panels, removing any dirt or debris.
Look for any objects or structures that might be casting shadows on the array throughout the day.
Access the inverter monitoring interface or app to check the input voltage and current from each string of panels.
Significant discrepancies between strings may indicate a problem with specific panels or wiring.
Verify that the inverter temperature is within normal operating range as excessive heat can cause the unit to throttle output to protect itself. Ensure adequate ventilation around the inverter and consider adding shade or cooling measures if it is installed in direct sunlight.
Check the DC cable connections for corrosion or looseness that could increase resistance and reduce power transfer. If output remains low after these checks, individual panel testing or professional inspection may be required to identify faulty components.
5) Communication Failure or Monitoring System Offline
Many Growatt users rely on WiFi or data logger connectivity to monitor their system performance remotely through the ShinePhone app or web portal.
A common frustration occurs when the monitoring system shows offline status and prevents access to real-time data and historical performance information.
The inverter continues to operate and generate power but users cannot monitor its status remotely.
Communication failures typically result from WiFi connectivity issues between the inverter or data logger and the home network.
Weak signal strength due to distance from the router, interference from other devices or changes to network settings can disrupt the connection.
Router reboots, password changes or network name modifications will cause the connection to drop. Sometimes the Growatt server experiences maintenance or temporary outages that affect monitoring services.
In other cases, the internal WiFi module or data logger device may have failed or requires a firmware update.
To restore communication, start by checking your home internet connection to ensure it is working properly.
Test the WiFi signal strength at the inverter location using your smartphone. If the signal is weak, consider relocating your router closer to the inverter or installing a WiFi range extender.
Verify that your network name and password have not changed. If they have, you will need to reconnect the inverter to the WiFi network by accessing its setup mode.
Most Growatt inverters have a WiFi setup button that allows you to connect to the device directly from your phone and enter your network credentials.
Check that the data logger LED indicators show proper status lights according to your manual. If the lights indicate no connectivity, power cycle the data logger by switching off the inverter AC and DC disconnects for two minutes then switching them back on.
Update the firmware on your data logger and inverter if newer versions are available through the monitoring platform. Check the Growatt server status or contact their support team to rule out service-side issues.
If these steps do not resolve the problem, the WiFi module or data logger may need replacement.
6) Temperature-Related Derating and Overheating Warnings
Growatt inverters sometimes display temperature warning messages or exhibit reduced power output during hot weather conditions.
The inverter may show a high temperature fault or users notice significant power reduction during the hottest parts of the day even with strong sunlight.
This thermal derating is a protective mechanism but it reduces system efficiency and energy production.
Inverters generate heat during the conversion process and have maximum operating temperature limits.
When internal temperatures exceed safe thresholds, the inverter automatically reduces its output power to prevent component damage.
Poor installation location is the primary cause of overheating issues. Inverters installed in direct sunlight, enclosed spaces without ventilation or areas with restricted airflow will struggle to dissipate heat effectively.
High ambient temperatures combined with full power operation create excessive thermal stress on internal components. Blocked ventilation grilles due to dust accumulation or obstructions near the cooling fans also contribute to overheating.
To prevent temperature-related problems, evaluate the inverter installation location. Ideally the unit should be mounted in a shaded area protected from direct sunlight with good air circulation.
If the inverter is currently in direct sun, install a shade structure above it while maintaining adequate clearance for airflow. Never enclose the inverter in a tight cabinet or box without proper ventilation.
Clean all ventilation grilles and cooling fan openings to remove accumulated dust and debris. Ensure there is adequate clearance around the inverter as specified in the installation manual, typically at least 20-30 centimeters on all sides.
Check that cooling fans are operating properly by listening for fan noise during operation or observing fan rotation through ventilation openings. If fans are not running or sound abnormal, they may require replacement.
Consider the mounting surface as well since metal surfaces in direct sunlight can transfer heat to the inverter. If ambient temperatures regularly exceed 40 degrees Celsius in your location, additional cooling measures such as supplemental ventilation fans may be necessary.
Some advanced users install temperature-controlled ventilation systems near their inverters to maintain optimal operating conditions.
Understanding these common Growatt inverter issues empowers you to maintain your solar energy system effectively and address problems quickly when they arise.
Regular monitoring, periodic maintenance and prompt attention to error messages will keep your system operating efficiently for years to come.
While many troubleshooting steps can be performed safely by system owners, always consult qualified solar technicians for complex electrical work or when problems persist after basic troubleshooting attempts.
why inverter keeps switching off when powered on
Reasons why low battery problem occurs in luminous inverter
how to maintain efficiency in a 12v off grid solar setup
What differentiates a solar generator from a normal solar setup
Solutions to Exide inverter overload trip problems
Common solax inverter problems and solutions
Common deye inverter problems and solutions guide
How to get the best from your solar setup
Common victron inverter problem causes and solutions
Understanding luminous zelio 1100 troubleshooting for common issues
Luminous eco volt 1050 troubleshooting guide
Magnum ms2012 inverter troubleshooting
