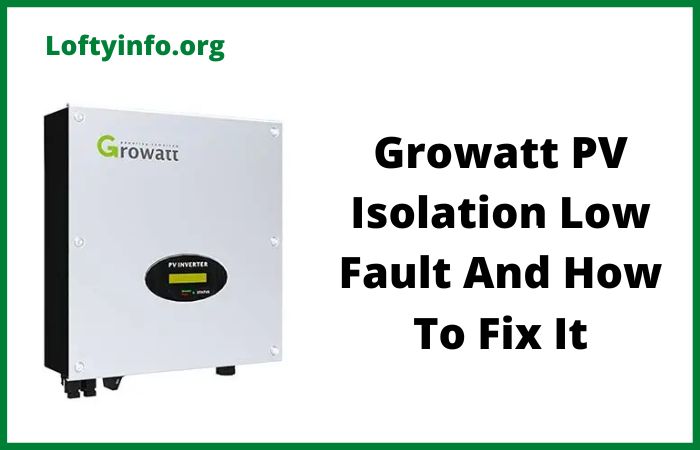
What Growatt PV Isolation Low Fault Is: Causes and Solutions
When operating a solar power system, encountering an error message on your Growatt inverter can be concerning.
Among the various fault codes that may appear, the pv isolation low fault stands out as one of the most common issues that solar system owners face.
This fault occurs when the inverter detects insufficient insulation resistance between the photovoltaic panels and the earth ground, creating a potential safety hazard that requires immediate attention.
The Growatt inverter continuously monitors the insulation resistance between the positive and negative dc inputs and the ground connection.
When this resistance falls below the preset threshold, typically around 50 kilohms, the inverter displays the pv isolation low message and shuts down power generation to prevent electric shock risks.
Understanding what causes this fault and how to resolve it effectively can save you time and money while ensuring your solar system operates safely and efficiently.
Causes Of Growatt PV Isolation Low Fault
1) Moisture Ingress in Solar Panels and Junction Boxes
One of the primary causes of pv isolation low faults in Growatt inverters is moisture penetration into solar panels or junction boxes.
Water ingress significantly reduces the insulation resistance between the electrical components and ground, triggering the safety mechanism in your inverter.
This problem often manifests during early morning hours when dew forms on the panels or immediately after rainfall.
The junction box located on the back of each solar panel serves as the connection point where individual solar cells are interconnected and current is collected.
When these boxes are not properly sealed, water can seep inside and create a conductive path between the electrical terminals and the grounded panel frame.
Moisture can penetrate through damaged encapsulation materials, cracked backsheets, or deteriorated sealing compounds around the junction box edges.
Environmental factors play a significant role in moisture-related isolation faults.
High humidity environments, coastal installations exposed to salt spray and regions with frequent temperature fluctuations experience accelerated degradation of sealing materials.
The repeated expansion and contraction cycles that occur as panels heat up during the day and cool down at night can stress the seals over time, creating microscopic gaps that allow moisture infiltration.
To troubleshoot moisture-related issues, begin by performing a visual inspection of all solar panels during dry conditions.
Look for any signs of water accumulation, condensation between the glass and cells, discoloration or foggy appearance inside the panel encapsulation.
Check all junction boxes to ensure the covers are securely fastened and the sealing gaskets are intact without cracks or deterioration.
If you notice the fault appears only in the morning and clears up by mid-morning, this pattern strongly indicates dew-related moisture issues.
Apply marine-grade silicone sealant around any gaps or replace damaged gaskets to restore proper sealing.
For panels showing signs of internal moisture penetration through compromised encapsulation, replacement is usually necessary as these cannot be effectively repaired.
2) Damaged Solar Panels and DC Wiring
Physical damage to solar panels or dc wiring represents another significant cause of pv isolation low faults.
During installation, mounting screws that penetrate too deep through panel frames can pierce through the backsheet and damage the solar cells or internal wiring.
Conducting wires pinched against mounting rails or sharp metal edges can suffer insulation degradation over time, especially when subjected to thermal expansion and contraction cycles.
Rodent damage is surprisingly common in solar installations. Squirrels, rats, and other animals may chew through wire insulation seeking nesting materials or simply out of curiosity.
The damaged insulation exposes the copper conductor, which can then make contact with grounded metal components like panel frames, conduit or mounting structures.
Even a single point of contact between an exposed conductor and ground is sufficient to trigger the isolation fault.
Cable management practices during installation significantly impact the long-term reliability of the system.
Wires left dangling or loosely secured can rub against abrasive surfaces due to wind movement, gradually wearing through the insulation.
Excessive bending of cables beyond their minimum bend radius can crack the insulation material.
To identify physical damage issues, first turn off all dc and ac isolators to de-energize the system completely for safety.
Carefully examine all visible wiring runs from the panels to the inverter, paying special attention to areas where wires pass through conduit entries, make tight bends or contact mounting hardware.
Look for signs of insulation damage such as exposed copper, discoloration, melting or cuts in the protective sheathing.
Check mounting points on each panel to verify that screws have not been over-tightened or installed at incorrect depths that could compromise the panel backsheet.
If you discover damaged wiring, the affected section must be replaced with properly rated solar cable.
Never attempt to repair damaged insulation with electrical tape as this is not a permanent solution and does not meet electrical code requirements.
3) Poor Cable Connections and Junction Quality
Inadequate electrical connections between solar panels or at junction points frequently cause isolation faults in photovoltaic systems.
The quality of connections directly affects both the electrical performance and safety of the installation.
Poor connections can result from several factors including improper connector assembly, aging components, corrosion, or substandard installation practices.
MC4 connectors, the industry standard for solar panel connections, must be properly crimped and fully engaged to maintain reliable contact and weatherproof integrity.
If these connectors are not clicked together completely, moisture can enter the connection point.
Over time, this moisture causes corrosion of the metal contacts, increasing resistance and potentially creating leakage paths to ground.
If the connector crimps were not properly made during installation using the correct tools and techniques, the connection may be mechanically weak and electrically compromised.
Junction boxes that combine multiple strings also present potential failure points.
Inside these boxes, if wire nuts or terminal connections become loose due to thermal cycling or vibration, arcing can occur which damages the connection point and surrounding materials.
Loose connections generate heat, which accelerates insulation breakdown and increases the likelihood of moisture infiltration.
To troubleshoot connection issues, start by systematically checking all accessible connections in the system.
Begin at the panel level by inspecting each MC4 connector pair to ensure they are fully mated and cannot be pulled apart easily.
Listen for a distinct click when reconnecting any that seem questionable.
Examine the connector housings for cracks or damage that could allow water entry. For junction boxes, turn off all power before opening them for inspection.
Check that all wire nut connections are tight and that there are no signs of overheating such as discoloration or melted insulation.
If you find corrosion on any contacts, clean them with a wire brush and apply contact cleaner.
Severely corroded connections should be cut back and remade with new connectors.
4) Inadequate or Faulty Grounding Systems
The grounding configuration of your solar installation plays a crucial role in both safety and fault detection.
An improperly installed ground system or deteriorated ground connections can manifest as a pv isolation low fault.
The grounding system serves multiple purposes including electrical shock protection, lightning surge dissipation, and providing a reference point for the inverter’s isolation monitoring circuit.
Common grounding problems include loose connections between the solar panel frames and the grounding conductor, corroded ground terminals, undersized ground wires or improper bonding of system components.
If the main ground connection to the earth electrode system has high resistance due to corrosion or a poor earth ground, the inverter may interpret this as an isolation fault.
If multiple ground paths exist with different impedances, circulating currents can create voltage differences that confuse the inverter’s monitoring circuits.
In some installations, the ground wire itself may be damaged or have deteriorated connections at critical junction points.
Aluminum grounding conductors are particularly susceptible to galvanic corrosion when in contact with dissimilar metals unless proper anti-oxidant compounds are used.
To resolve grounding issues, begin by verifying that all ground connections are tight and clean.
Use a wire brush to remove any corrosion from terminals and apply a thin coat of anti-oxidant compound before reassembly.
Check that the main grounding electrode conductor is properly sized for your system and that the connection to the ground rod or grounding electrode system is secure.
Inspect the bonding jumpers that connect panel frames to the grounding conductor, ensuring each connection is mechanically sound and electrically continuous.
Consider consulting with a licensed electrician to measure the ground system impedance and verify it meets code requirements.
5) Environmental Factors and Panel Surface Contamination
Environmental conditions and surface contamination on solar panels can contribute to isolation faults, particularly in certain climates or industrial environments.
Coastal installations face unique challenges from salt spray and marine environments.
Salt deposits on panel surfaces and frames create conductive paths when combined with moisture from fog, dew, or rain.
The salt residue acts as an electrolyte, allowing current leakage between the panel’s electrical components and the grounded frame.
Agricultural areas present another set of challenges.
Fertilizer dust, pesticide residues, and organic matter can accumulate on panels and mounting structures.
When these contaminants become wet, they reduce the insulation resistance between live parts and ground.
Bird droppings are particularly problematic because they are both acidic and conductive when moist, and they tend to accumulate at panel edges near the frames where they can bridge the gap between cells and grounded metal.
To address environmental contamination issues, establish a regular cleaning schedule appropriate for your location’s conditions.
Coastal installations may require monthly cleaning to remove salt buildup, while most other locations can operate effectively with semi-annual cleaning.
Use only soft brushes or sponges with plain water or approved solar panel cleaning solutions.
Pay particular attention to panel edges and the areas around the frame where contamination tends to accumulate.
For bird droppings, remove them promptly as they can etch the glass surface if left in place.
6) System Reset and Inverter Configuration Issues
Sometimes the pv isolation low fault can result from temporary glitches in the inverter’s monitoring system rather than an actual insulation problem.
Electronic components can occasionally produce false readings due to electrical noise, voltage spikes from grid disturbances or simply random errors in the monitoring circuit.
Before investing time and money in extensive troubleshooting of physical components, performing a complete system reset often resolves temporary faults.
To perform a proper system reset, follow this sequence carefully.
First, turn off the solar supply main switch or ac isolator that disconnects the inverter from the grid.
Next, turn off the pv array dc isolator that disconnects the solar panels from the inverter.
Wait until the inverter display goes completely blank and all indicator lights turn off.
After at least three minutes, turn on the pv array dc isolator first, followed by the solar supply main switch. Wait several minutes while the inverter performs its startup checks and reconnects to the grid.
If the isolation fault reappears immediately after the reset, you likely have a genuine physical problem that requires investigation using the troubleshooting steps outlined in the previous sections.
If the system operates normally after the reset, monitor it closely over the next few days.
The pv isolation low fault on Growatt inverters, while concerning, is a critical safety feature designed to protect you and your property from electrical hazards.
Understanding the various causes from moisture ingress and physical damage to connection problems and environmental factors equips you to diagnose and address issues systematically.
Regular preventive maintenance significantly reduces the likelihood of isolation faults.
Always prioritize safety when dealing with electrical systems.
If you are not confident in your ability to safely troubleshoot the issue, or if the fault persists after attempting basic remedies, contact a licensed solar electrician or your system installer.
what causes inverter battery to develop heat when charging
how to power appliances directly from solar panels
Why an inverter cannot power appliances directly from solar power without battery


