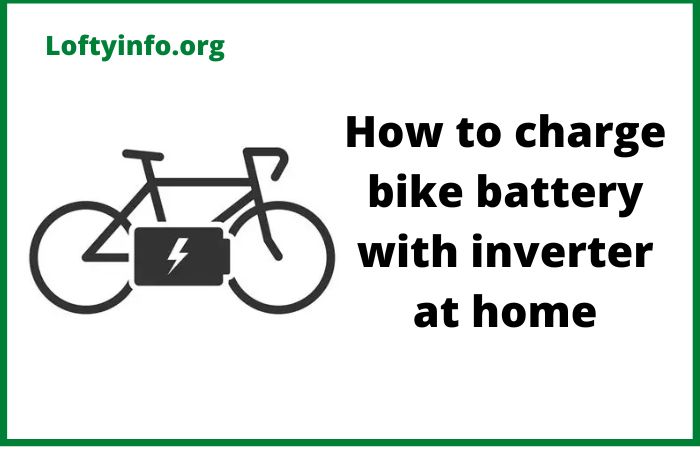
How to Charge Bike Battery with Inverter at Home
Power outages and electrical disruptions can be frustrating, especially when you need to charge your motorcycle battery for an urgent ride.
While most riders rely on direct AC power outlets, there are situations where using an inverter becomes necessary whether you’re off-grid, experiencing load shedding or simply want a backup charging solution.
Understanding how to charge bike battery with inverter at home can save you from being stranded and provide flexibility in various scenarios.
An inverter converts DC (Direct Current) power from a battery source, typically a car battery, solar panel system or power station into AC (Alternating Current) power that your standard battery charger requires.
This method is particularly useful for riders in areas with unreliable electricity supply or those who want energy independence.
Let’s explore the proper methods, safety considerations and step-by-step procedures to successfully charge your motorcycle battery using an inverter.
Understanding the Basics: What You Need
Before attempting to charge your bike battery through an inverter, you need to understand the equipment involved and their compatibility.
Your motorcycle battery is typically a 12-volt lead-acid battery (either conventional flooded type, AGM, or gel) though some smaller bikes might use 6-volt systems.
The charging process requires converting stored DC power to AC power, then back to regulated DC power through your battery charger.
The essential components include a power inverter (minimum 300-watt capacity though 500-1000 watts is recommended), a DC power source such as a car battery or deep-cycle battery, a standard motorcycle battery charger and proper connection cables.
The inverter must be a pure sine wave or modified sine wave type.
Pure sine wave inverters are preferred as they provide cleaner power that’s safer for sensitive charging electronics.
Your battery charger’s wattage determines the inverter size you need. Most motorcycle battery chargers consume between 50 to 200 watts during operation.
To calculate the minimum inverter capacity, multiply your charger’s wattage by 1.5 to account for efficiency losses and startup surge.
For example, a 100-watt charger would require at least a 150-watt inverter, though having extra capacity prevents overloading.
How to Charge Bike Battery with Inverter at Home
Method One: Using a Car Battery and Inverter
The most common approach to charge bike battery with inverter at home involves using your car’s battery as the DC power source.
This method is ideal during power outages or when you don’t have access to a wall outlet.
Start by ensuring your car battery is fully charged.
A depleted car battery won’t provide sufficient power for the charging process.
Park your car in a well-ventilated area near your motorcycle.
Turn off the car engine and all electrical accessories.
Connect the inverter directly to your car battery using heavy-duty cables with appropriate gauge typically 8 to 10 AWG for inverters up to 1000 watts.
Attach the red positive cable from the inverter to the positive terminal of the car battery first, then connect the black negative cable to the negative terminal.
Ensure connections are tight and secure to prevent arcing or power loss.
Once the inverter is connected, plug your motorcycle battery charger into the inverter’s AC outlet.
Connect the charger leads to your bike’s battery, red to positive and black to negative.
Turn on the inverter then activate your battery charger.
Monitor the charging process closely especially during the first 15-30 minutes.
The car battery should handle several hours of charging without significant depletion but avoid running it completely flat.
After charging is complete, disconnect in reverse order: turn off the charger, unplug it from the inverter, disconnect charger leads from the bike battery, turn off the inverter and finally remove inverter cables from the car battery.
If your car battery shows signs of depletion (dimming inverter display, reduced output), start the car engine and let it run for 20-30 minutes to recharge before disconnecting.
Method Two: Using a Dedicated Deep-Cycle Battery System
For a more permanent solution, especially in areas with frequent power cuts, setting up a dedicated deep-cycle battery with an inverter provides reliable backup power.
Deep-cycle batteries are designed for repeated discharge and recharge cycles, making them superior to regular car batteries for this application.
This setup can be combined with solar panels for a completely off-grid charging station.
Select a deep-cycle battery with adequate capacity, a 100Ah 12-volt battery can power a typical motorcycle charger for 8 to 12 hours.
Connect your inverter to this battery using appropriate gauge cables and secure mounting.
Many riders install this setup in their garage as a permanent backup power station.
The inverter can remain connected to the battery, ready to use whenever needed.
The charging process mirrors the car battery method: plug your motorcycle battery charger into the inverter, connect it to your bike’s battery and initiate charging.
The advantage here is that you’re not depleting your vehicle’s battery, and you can leave the setup running overnight without concern.
Monitor the deep-cycle battery’s voltage periodically, most should not be discharged below 50% capacity to maximize lifespan.
If you’re incorporating solar panels, position them to receive maximum sunlight and connect them to a charge controller which then feeds the deep-cycle battery.
This creates a sustainable system where solar energy charges your backup battery during the day and you can use that stored power to charge your motorcycle battery anytime, truly achieving how to charge bike battery with inverter at home in an eco-friendly manner.
Method Three: Using a Portable Power Station
Portable power stations have become increasingly popular and offer the simplest method for inverter-based charging.
These units combine a battery, inverter, and multiple outlets in one compact device.
Many modern power stations feature pure sine wave inverters and sufficient capacity (300-1000Wh) to fully charge a motorcycle battery multiple times.
To use this method, ensure your power station is fully charged, most can be charged via wall outlet, car outlet or solar panels.
Simply plug your motorcycle battery charger into the power station’s AC outlet, connect the charger to your bike battery and begin charging.
The built-in inverter handles all power conversion automatically.
Power stations typically include LED displays showing remaining capacity, allowing you to monitor whether you have sufficient power to complete the charging process.
This method offers maximum convenience and portability.
You can easily move the power station to wherever your motorcycle is parked, eliminating the need for extension cords or repositioning your bike.
The all-in-one design also reduces connection points, minimizing potential failure points and safety risks.
Critical Safety Considerations
When learning how to charge bike battery with inverter at home, safety must be your top priority.
Always work in well-ventilated areas, as both the DC source battery and the motorcycle battery can emit hydrogen gas during charging, which is highly flammable.
Never smoke or create sparks near charging batteries.
Keep a fire extinguisher rated for electrical fires nearby.
Inspect all cables and connections before each use.
Damaged insulation, frayed wires, or corroded terminals can cause short circuits, fires or electric shock.
Use cables rated for the current your system will draw undersized cables overheat and pose fire hazards.
Ensure all connections are tight, as loose connections create resistance, generate heat and waste power.
Never exceed your inverter’s rated capacity.
Overloading causes inverters to overheat, shut down or fail permanently. Most inverters include overload protection but relying on these safety features regularly shortens the inverter’s lifespan.
Match your equipment properly, don’t use a 300-watt inverter for a charger that might draw 400 watts during initial startup.
Monitor both batteries during the charging process.
If either battery becomes excessively hot to the touch, shows swelling or emits unusual smells, immediately stop charging and disconnect all equipment.
These are signs of dangerous malfunction.
Similarly, if your inverter’s cooling fan runs continuously at high speed or the unit becomes very hot, reduce the load or allow cooling before continuing.
Maximizing Efficiency and Battery Health
To get the best results when charging through an inverter, use a smart charger with multiple charging stages (bulk, absorption, float).
These chargers automatically adjust current and voltage, preventing overcharging while ensuring complete charging.
Avoid cheap trickle chargers, as they lack proper regulation and can damage your battery over extended use.
Charging time through an inverter matches charging time from a wall outlet, typically 4 to12 hours depending on battery size and depletion level.
You must account for the DC source battery’s capacity.
A severely depleted motorcycle battery requiring a full 10-hour charge will significantly drain your car or backup battery.
Calculate your power requirements beforehand to ensure your DC source can handle the complete charging cycle.
Temperature affects charging efficiency significantly.
Cold batteries charge slowly and may not reach full capacity, while hot batteries risk damage from overcharging. Ideal charging temperature is 50-80°F (10-27°C).
If possible, bring your motorcycle battery indoors to a temperature-controlled environment before charging, or insulate outdoor charging setups during extreme weather.
Regular maintenance extends both your inverter system and batteries’ lifespan.
Keep battery terminals clean and corrosion-free using a wire brush and terminal protection spray. Check electrolyte levels in conventional flooded batteries monthly.
Store your inverter in a dry location when not in use, and periodically test your backup battery system to ensure it’s ready when needed.
Conclusion
Mastering how to charge bike battery with inverter at home provides valuable independence from grid power and ensures your motorcycle is always ready when you need it.
Whether using your car battery during emergencies, maintaining a dedicated deep-cycle backup system or investing in a portable power station, each method offers distinct advantages for different situations and budgets.
The key to success lies in proper equipment selection, maintaining safe practices and understanding your power requirements.
With the right inverter, adequate DC power source, and quality battery charger, you can confidently charge your motorcycle battery anywhere, anytime.
This skill proves especially valuable for riders in areas with unreliable electricity, those who enjoy off-grid adventures or anyone who wants backup options for unexpected power outages.
Remember that while charging through an inverter is highly effective, it should complement rather than completely replace standard AC charging when available.
Regular maintenance, proper storage and preventive care will keep your motorcycle battery healthy and your inverter system ready for years of reliable service.
Reasons to get a bigger home battery for solar setup
Best small inverter with battery for shop
How to take care of inverter battery
Best small inverters with battery for home
How to make tubular inverter battery last for a long time
How to charge mobile phones with solar panel
Why you should not charge lithium iron phosphate battery with car alternator