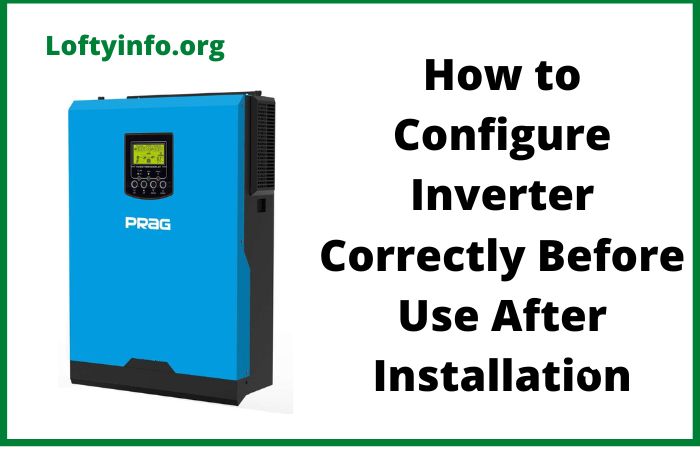
How to Configure Inverter Correctly Before Use After Installation
Installing a power inverter is only half the battle.
The difference between a system that performs optimally for years and one that fails prematurely often comes down to proper configuration.
Many users make the costly mistake of connecting their inverters immediately after installation without adjusting critical settings to match their specific power requirements and battery specifications.
Understanding how to configure inverters correctly before use after installation is essential for maximizing efficiency, protecting your equipment and ensuring reliable backup power when you need it most.
Think of your inverter as the intelligent brain of your power backup system.
Just as a new smartphone requires initial setup to function according to your preferences, your inverter needs proper configuration to operate safely within the parameters of your electrical setup.
The factory default settings are generic and rarely suit every installation scenario.
Without proper adjustment, you risk damaging your batteries through improper charging, experiencing unexpected shutdowns during critical moments or reducing the overall lifespan of your investment.
This comprehensive guide walks you through the essential configuration steps that will transform your inverter from a basic power converter into a finely tuned energy management system.
How to Configure Inverter Correctly Before Use After Installation
1) Low Voltage Disconnect (LVD) Settings
The Low Voltage Disconnect is your battery’s primary defense against deep discharge damage.
This critical setting determines the voltage level at which your inverter automatically disconnects from the battery to prevent over-discharge.
For a 12V lead-acid battery system, the LVD should typically be set between 11V and 11.5V, while lithium batteries usually require settings between 10.5V and 11V depending on the manufacturer’s specifications.
Setting this value too low will allow your batteries to discharge beyond safe limits, causing irreversible sulfation in lead-acid batteries or triggering protection circuits in lithium systems.
Setting it too high means you won’t utilize the full capacity of your battery bank.
Always consult your battery manufacturer’s documentation for the recommended cutoff voltage and adjust your inverter’s LVD accordingly through the configuration menu or DIP switches, depending on your model.
2) High Voltage Disconnect (HVD) Settings
While often overlooked, the High Voltage Disconnect protects your inverter and connected appliances from overvoltage conditions that can occur during charging or when using alternative energy sources like solar panels.
For 12V systems, the HVD should typically be configured between 15V and 16V for lead-acid batteries.
This setting ensures that if your charging system malfunctions and continues pushing voltage beyond safe limits, the inverter will disconnect before damage occurs.
Lithium battery systems may require different HVD values based on the Battery Management System specifications, often around 14.6V to 15V.
Proper HVD configuration is particularly crucial in solar installations where charge controllers might occasionally produce voltage spikes during certain weather conditions or system transitions.
3) Battery Type Selection
Modern inverters support multiple battery chemistries and selecting the correct battery type in your inverter’s settings is fundamental to proper system operation.
This configuration affects charging algorithms, voltage thresholds and temperature compensation features.
Lead-acid batteries include subtypes like flooded, AGM, and gel, each requiring different charging profiles.
Flooded batteries can tolerate higher charging voltages and need equalization charging, while gel batteries require gentler charging to prevent gas buildup.
Lithium batteries demand precise voltage control and may not require the multi-stage charging that lead-acid types need.
When you configure inverter correctly before use after installation by selecting the accurate battery type, the inverter automatically adjusts its charging parameters to optimize battery health and longevity.
Mismatching this setting is one of the most common configuration errors and can reduce battery life by 50% or more.
4) Charging Current Limits
The charging current setting controls how quickly your inverter charges the connected battery bank when AC power is available.
This parameter must be carefully balanced between charging speed and battery health.
As a general rule, lead-acid batteries should be charged at a rate not exceeding 20-25% of their amp-hour capacity.
For example, a 200Ah battery bank should have its charging current limited to 40-50A maximum.
Lithium batteries can often accept higher charge rates, sometimes up to 50% of capacity but always verify with your battery specifications.
Setting the charging current too high generates excessive heat, accelerates plate degradation in lead-acid batteries and can trigger safety disconnects.
If the charging current is too low, your batteries may never reach full charge between power outages leading to gradual capacity loss through chronic undercharging.
Most quality inverters allow adjustment of charging current in increments, enabling you to fine-tune this critical parameter.
5) Output Voltage and Frequency
While it might seem obvious, confirming your inverter’s output voltage and frequency settings match your regional electrical standards is essential.
Most countries use either 220 to 240V at 50Hz or 110 to 120V at 60Hz.
Installing an inverter with incorrect output settings can damage sensitive electronics, cause motors to run at wrong speeds or create safety hazards.
Beyond basic voltage selection, some advanced inverters allow fine-tuning of output voltage within a range, typically ±5%.
Setting the output slightly higher perhaps 230V instead of 220V can compensate for voltage drop in long cable runs and ensure appliances receive adequate power.
Excessive voltage can stress equipment so adjustments should be minimal and measured.
The frequency setting is equally important because many timing circuits, clocks and motor speeds depend on precise frequency.
Verify these settings during your initial configuration and use a multimeter to confirm actual output values.
6) Transfer Time and Priority Settings
The transfer time determines how quickly your inverter switches between grid power and battery power during an outage while priority settings establish which power source the inverter prefers when both are available.
For most household applications, a transfer time of 10-20 milliseconds is ideal, fast enough to prevent computer shutdowns or entertainment system resets.
Critical medical equipment or server installations might require even faster transfer times, sometimes under 5ms.
The priority setting typically offers options like “grid priority,” where the inverter uses utility power whenever available and reserves battery power for outages or “battery priority,” which uses stored solar energy first before drawing from the grid.
Some systems include a “solar priority” option for photovoltaic installations.
Understanding how to configure inverter correctly before use after installation means selecting transfer times and priorities that align with your backup goals and the sensitivity of your connected loads.
7) Load Sensing and Power Saving Modes
Energy efficiency features like load sensing and power saving modes can significantly reduce your inverter’s idle consumption which is particularly important in off-grid or solar installations.
Load sensing automatically detects when appliances are drawing power and switches the inverter from standby to active mode then returns to low-power standby when loads are removed.
The sensitivity threshold needs careful adjustment because setting it too high might cause the inverter to shut down with small loads like phone chargers while too low sensitivity wastes energy by keeping the inverter fully active even when minimal power is needed.
Power saving modes reduce the inverter’s search frequency when in standby, checking for loads every few seconds rather than continuously.
This can reduce standby consumption from 15 to 20W to just 5-8W meaningful savings over time.
This creates a slight delay before the inverter responds to newly connected loads, so it’s less suitable for applications requiring instant power availability.
8) Temperature Compensation and Fan Settings
Battery charging voltage requirements vary with temperature and modern inverters incorporate temperature compensation to adjust charging parameters automatically.
When you configure inverter correctly before use after installation, enabling and calibrating temperature compensation ensures optimal charging across seasonal temperature variations.
Lead-acid batteries require lower charging voltages in hot conditions to prevent overcharging and gassing while cold temperatures demand higher voltages to overcome increased internal resistance.
The compensation factor typically ranges from -3mV to -5mV per degree Celsius per cell.
For a 12V battery system with six cells, this translates to approximately -18mV to -30mV per degree.
If your inverter includes an external temperature sensor, install it directly on a battery terminal or case for accurate readings.
Fan settings control when cooling fans activate based on temperature or load levels.
Conservative fan settings improve component longevity but may increase noise while aggressive settings keep the inverter cooler but wear out fan bearings faster.
Final Configuration Verification
After adjusting all settings, conducting a systematic verification process ensures everything functions as intended.
Start by using the inverter’s display or monitoring interface to review all configured parameters, confirming they match your intended values.
Test the LVD by gradually discharging your batteries while monitoring voltage until the disconnect occurs, verifying it triggers at your configured threshold.
If possible, test the HVD during a charging cycle.
Verify the output voltage and frequency using a quality multimeter at several outlets throughout your installation.
Test the transfer time by disconnecting grid power and observing whether sensitive equipment continues operating without interruption.
Document all your settings in a configuration sheet stored in a safe location, as this becomes invaluable for troubleshooting or if settings are accidentally changed.
Many installers photograph the configuration screens as backup documentation.
With your inverter properly configured, you’ve transformed it from a simple power converter into a sophisticated energy management system tailored to your specific needs.
These settings work together to protect your batteries, ensure reliable power delivery and maximize the lifespan of your entire system.
Remember that configuration isn’t a one-time task.
As batteries age, seasonal conditions change or you add new appliances, revisiting these settings ensures continued optimal performance.
The investment of time spent understanding and implementing these configurations pays dividends through years of reliable, efficient power backup that serves your home or business exactly when needed most.
Consfiguring your inverter correctly before use after installation will not only ensure optimal performance from your inverter but will also help the inverter last long too.
How to prevent frequent inverter damage when connected to grid


