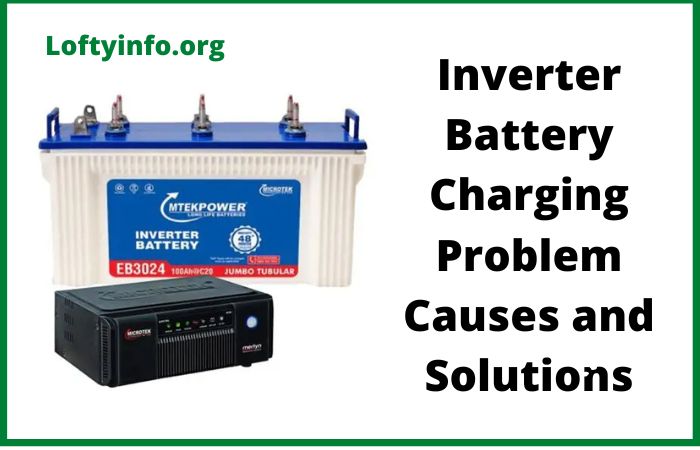
Inverter Battery Charging Problem Causes and Solutions
Power outages can be frustrating, especially when you discover your inverter isn’t doing its job because the battery won’t charge properly.
An inverter system is only as reliable as its ability to store energy and when charging issues arise, your backup power solution becomes ineffective.
Understanding why your inverter battery fails to charge and knowing how to fix these problems can save you from unexpected blackouts and costly repairs.
This comprehensive guide walks you through the most common inverter battery charging problem causes and solutions, helping you restore your power backup system to optimal performance.
Inverter Battery Charging Problem Causes and Solutions
1) Faulty or Loose Battery Connections
One of the most overlooked yet frequent causes of charging failure is poor electrical connections.
Over time, battery terminals accumulate corrosion, dust and oxidation that creates resistance between the battery and inverter.
Loose cable connections can also interrupt the charging circuit, preventing proper current flow.
To troubleshoot this issue, start by switching off your inverter and disconnecting it from the mains power supply.
Carefully inspect both the positive and negative terminals on your battery.
Look for white, blue or green powdery deposits around the terminals, these are signs of corrosion.
Remove the battery cables and clean the terminals thoroughly using a wire brush and a mixture of baking soda and water.
For stubborn corrosion, sandpaper can help restore the metal surface.
After cleaning, ensure you reconnect the cables tightly, with the positive terminal connected first, followed by the negative.
Apply a thin layer of petroleum jelly or terminal grease to prevent future corrosion.
Check that all connections along the cable path are secure and free from damage.
2) Damaged or Aging Battery
Batteries have a finite lifespan, typically ranging from three to five years depending on usage patterns and maintenance.
As batteries age, their internal chemistry degrades, reducing their capacity to accept and hold a charge.
Physical damage such as cracks in the casing, bulging sides or leaking electrolyte also prevents proper charging.
To diagnose a damaged battery, perform a visual inspection first.
Look for any physical deformities, cracks or signs of electrolyte leakage around the battery casing.
Check the manufacturing date, if your battery is beyond its expected lifespan, replacement is likely necessary.
Use a multimeter to measure the battery voltage.
A fully charged 12V battery should read between 12.6 and 12.8 volts when disconnected from the inverter.
If the reading is significantly lower (below 10.5V) and the battery fails to charge after several hours, the battery cells may be sulfated or dead.
For batteries with removable caps, check the electrolyte level and color.
The liquid should cover the plates and appear clear. Dark, murky electrolyte indicates internal damage.
Unfortunately, severely damaged or aged batteries cannot be repaired and must be replaced with new ones that match your inverter’s specifications.
3) Defective Inverter Charger Circuit
The charging circuit within your inverter converts AC power from the mains into DC power suitable for battery charging.
When this circuit malfunctions due to damaged components like capacitors, diodes or voltage regulators, the battery receives insufficient or no charging current.
Troubleshooting the charger circuit requires some technical knowledge.
First, verify that your inverter is receiving proper mains voltage by checking your home’s circuit breaker and electrical outlets.
Use a multimeter to measure the AC input voltage at the inverter, it should match your region’s standard (typically 220-240V).
Next, check if the inverter’s charging indicator light is functioning.
Consult your inverter’s manual to understand what different light patterns mean.
If the light indicates charging but the battery voltage isn’t increasing, the problem lies within the charging circuit.
Check the inverter’s fuse or circuit breaker, as a blown fuse will prevent charging entirely. Replace any blown fuses with the correct rating.
If the external indicators seem normal but charging doesn’t occur, the internal charging circuit likely has failed components.
This typically requires professional repair or replacement, as it involves working with high-voltage components and circuit boards that need specialized tools and expertise to diagnose and fix properly.
4) Incorrect Inverter Settings
Modern inverters come with adjustable charging parameters that must match your battery type and specifications.
Incorrect settings for charging voltage, charging current or battery type can prevent efficient charging or cause the inverter to undercharge the battery.
To resolve settings-related issues, locate your inverter’s user manual or settings menu.
Most inverters have buttons or a digital display that allows you to access configuration options.
Verify that the battery type setting matches your actual battery, common types include lead-acid, tubular, flat plate or maintenance-free batteries, each requiring different charging profiles.
Check the charging voltage setting, which should typically be between 13.8V and 14.4V for a 12V battery system (proportionally higher for 24V systems).
If set too low, the battery won’t reach full charge; if too high, it may cause overcharging and damage.
Confirm the charging current setting aligns with your battery’s recommended charging rate, usually 10-15% of the battery’s amp-hour capacity.
For example, a 150Ah battery should charge at approximately 15 to 22 amps.
Some inverters also have equalization or boost charging modes that should be enabled periodically for flooded lead-acid batteries to prevent sulfation.
Adjust these settings according to the manufacturer’s recommendations for both your inverter and battery.
5) Overloaded Inverter System
When your inverter supplies power to appliances that exceed its rated capacity, it prioritizes powering the load over charging the battery.
Continuous overloading not only prevents charging but can also damage both the inverter and battery due to excessive heat generation and stress on components.
To troubleshoot an overload situation, calculate the total wattage of all appliances connected to your inverter during a power outage.
Add up the power consumption of each device, this information is usually printed on the appliance label or in its manual.
Compare this total to your inverter’s continuous power rating, not its peak rating.
If your connected load approaches or exceeds 80% of the inverter’s capacity, you’re overloading the system.
Disconnect non-essential appliances, especially high-power devices like heaters, air conditioners, refrigerators or electric irons.
Monitor the inverter’s charging indicator after reducing the load, you should see it begin charging normally.
If overloading is frequent, consider upgrading to a higher-capacity inverter or adding a second battery to increase your energy storage.
Also, check your inverter’s cooling system, blocked ventilation fans or dust accumulation can cause overheating, which triggers protective circuits that stop charging.
Clean any dust from ventilation openings and ensure the inverter is installed in a well-ventilated location away from direct heat sources.
6) Low Electrolyte Level in Flooded Batteries
For flooded lead-acid batteries (those with removable caps), the electrolyte solution must remain at proper levels to facilitate the chemical reactions necessary for charging.
When electrolyte levels drop due to evaporation or overcharging, the exposed battery plates cannot participate in the charging process, significantly reducing charging efficiency.
To address this issue, ensure your inverter is switched off and disconnected from power.
Carefully remove the battery caps using a screwdriver or by hand, depending on your battery type. Shine a flashlight inside each cell to check the electrolyte level.
The liquid should cover the lead plates by approximately half an inch.
If the plates are exposed or the level is low, you need to add distilled water, never tap water, as minerals in tap water will damage the battery.
Using a funnel or battery filler, slowly add distilled water to each cell until the electrolyte reaches the proper level, typically indicated by a fill line inside the cell.
Avoid overfilling, as electrolyte can overflow during charging.
After refilling, replace the caps securely and wipe away any spilled liquid.
Allow the battery to rest for about 30 minutes before reconnecting it to the inverter.
The inverter should now charge the battery normally.
Make it a habit to check electrolyte levels monthly, especially during summer months when evaporation rates are higher.
This simple maintenance task can dramatically extend your battery’s lifespan and prevent many inverter battery charging problem causes and solutions scenarios.
Conclusion
Dealing with charging issues in your inverter battery system doesn’t have to be overwhelming.
By systematically checking connections, assessing battery health, verifying inverter settings, managing load properly, inspecting the charging circuit and maintaining electrolyte levels, you can identify and resolve most problems yourself.
Regular maintenance including cleaning terminals, checking water levels and ensuring proper ventilation goes a long way in preventing these issues from occurring in the first place.
When you encounter complex electrical faults within the inverter’s charging circuit or when troubleshooting steps don’t resolve the problem, don’t hesitate to contact a qualified technician.
A reliable inverter battery system provides peace of mind during power outages and keeping it in optimal condition ensures you’ll always have backup power when you need it most.
Inverter battery slow charging problem
Why does my inverter battery continue charging even when full
Solution for inverter charging light not blinking problem
Why is my inverter outputting low voltage
What to do when inverter is not charging battery
Exide inverter overload trip problems
Troubleshooting growatt pv isolation low fault
Common victron inverter problem causes and solutions
Causes of common luminous battery backup problems
Causes of Luminous inverter charging problem
How to configure inverter correctly before use after installation
