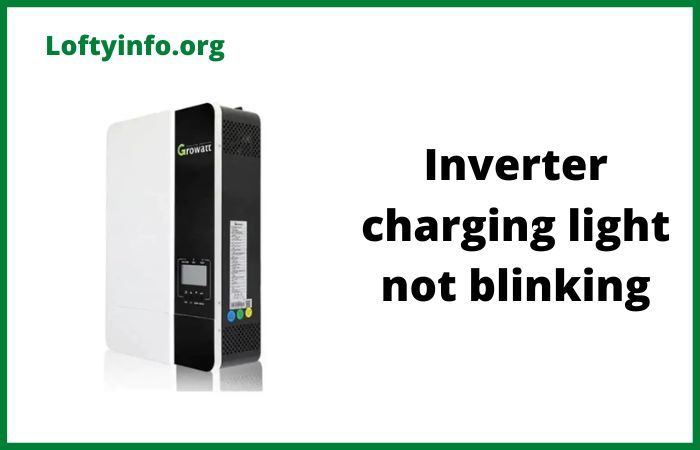
Inverter Charging Light Not Blinking: Causes And Solutions
Your inverter sits quietly in the corner of your room, and you suddenly notice something unsettling.
The charging light that usually blinks rhythmically to indicate power flowing into your battery is completely off.
This silent warning could mean the difference between having backup power during the next outage and being left in the dark.
Understanding why your inverter charging light stops blinking is essential for maintaining a reliable power backup system and preventing costly battery damage.
When an inverter charging light refuses to blink, it signals that something has disrupted the charging process.
This seemingly small indicator plays a massive role in your inverter’s operation because it tells you whether your battery is receiving the charge it needs to keep your home running during power cuts.
Ignoring this warning can lead to a completely drained battery, reduced battery lifespan and potentially expensive repairs or replacements.
Why Is Inverter Charging Light Not Blinking
1) Faulty or Loose Input Power Connection
The most common culprit behind a non-blinking charging light is a problem with the input power supply reaching your inverter.
Your inverter needs a stable connection to the main power source to charge its battery.
When this connection gets interrupted or weakened, the charging process stops immediately and the indicator light goes dark.
Check your main power socket first. Plug another device into the same outlet to verify that power is actually flowing through that socket.
Sometimes the issue is as simple as a tripped circuit breaker or a faulty wall socket that needs replacement.
The problem could also stem from loose wiring connections at the socket itself, which happens frequently in older buildings or areas with frequent electrical work.
Move on to examine the power cord connecting your inverter to the wall socket. Look for any visible signs of damage such as cuts, burns or exposed wiring.
Even if the cord looks fine externally, internal wire breaks can occur from repeated bending or pulling.
Try wiggling the cord gently while watching the charging light to see if it flickers, which would indicate a loose connection inside the cable.
The connection points where the power cord plugs into both the wall socket and the inverter unit deserve special attention.
These points can become loose over time due to vibrations, accidental bumps or simply the weight of the cord pulling on the connection.
Unplug the cord completely from both ends, inspect the pins for any signs of burning or corrosion, then plug everything back in firmly. Make sure you hear or feel a solid click indicating a secure connection.
2) Blown Fuse in the Inverter Circuit
Inverters contain protective fuses designed to safeguard the internal circuitry from power surges and electrical faults.
When these fuses blow, they cut off the charging circuit to prevent damage to more expensive components.
A blown fuse will stop the charging process entirely and your charging indicator light will not blink because no power is reaching the charging circuit.
Locating the fuse requires opening your inverter’s outer casing, so you must disconnect all power sources first for safety. The fuse is typically found near the input power terminals and looks like a small cylindrical component with metal caps on both ends. Some inverters use automotive-style blade fuses while others use glass tube fuses. Refer to your inverter’s manual to identify the exact fuse type and location.
Inspect the fuse carefully for signs of damage.
A blown glass fuse will show a broken wire inside the transparent tube or have blackened glass from burning. Blade fuses will have a broken connection visible through the plastic casing.
You can also use a multimeter set to continuity mode to test the fuse. A good fuse will beep or show zero resistance while a blown fuse will show infinite resistance.
Replace any blown fuse with an exact match in terms of amperage rating.
Using a fuse with higher amperage might seem like a solution but it defeats the protective purpose of the fuse and could allow dangerous current levels to damage your inverter.
If your new fuse blows immediately after replacement, you have a more serious electrical fault that requires professional diagnosis.
Never bypass or bridge a blown fuse with wire or foil as this creates a severe fire hazard.
3) Battery Connection Issues or Terminal Corrosion
Your inverter charging light monitors the flow of current into the battery.
When the connection between the inverter and battery becomes compromised, the charging circuit cannot complete its path and the indicator light stays off.
Battery connection problems rank among the top reasons for charging failures because these connections handle high currents and are prone to loosening and corrosion.
Start by checking the battery terminals themselves. Remove the terminal clamps and examine both the battery posts and the clamps for white, blue or green crusty deposits.
This corrosion acts as an insulator that blocks current flow between the battery and your inverter.
Clean corroded terminals using a mixture of baking soda and water applied with an old toothbrush. Scrub until you see clean, shiny metal on both the battery posts and the inside of the terminal clamps.
Loose battery connections cause just as many problems as corrosion.
The constant charging and discharging cycles create heat that can gradually loosen terminal bolts.
Check that your battery terminal clamps are tight enough that you cannot twist or pull them off by hand.
Avoid overtightening as this can crack the battery posts or damage the clamps.
The connection should be snug and secure without requiring excessive force.
Inspect the cables running from the inverter to the battery for any signs of damage, fraying or loose connections at the inverter end.
These cables carry significant current and any weakness in the conductor will prevent proper charging.
If you find damaged cables, replace them with cables of the same gauge or thicker. Using thinner cables will create resistance that generates heat and prevents efficient charging.
4) Defective Charging Circuit or Control Board
The internal electronics that control your inverter’s charging function can fail due to component aging, power surges or manufacturing defects.
When the charging circuit or control board malfunctions, it cannot regulate the charging process and the indicator light will not receive the signal to blink.
This type of failure requires technical knowledge to diagnose properly.
Modern inverters use microprocessors and control boards to manage the charging algorithm.
These boards monitor battery voltage, regulate charging current and control the indicator lights.
A failed component such as a transistor, capacitor or integrated circuit on this board can disable the entire charging function. You might notice other symptoms alongside the non-blinking light such as error codes on the display, unusual sounds from the inverter or complete failure to provide backup power.
Diagnosing control board issues without proper equipment and training is extremely difficult.
The problem could be a burned component that you can see or a failed microchip that looks perfectly normal.
Some inverters have built-in diagnostic modes that flash error codes through the indicator lights when you press specific button combinations.
Check your user manual for any diagnostic procedures that might help identify the specific fault.
Professional repair becomes necessary for control board problems in most cases.
Attempting to repair circuit boards without electronics expertise often causes more damage and can void your warranty.
Contact your inverter manufacturer’s service center or an authorized repair technician who has access to genuine replacement parts and circuit diagrams.
While this option costs more than simple fixes, it ensures proper diagnosis and repair that restores your inverter to full functionality.
5) Battery End of Life or Deep Discharge
Batteries have finite lifespans and when they reach the end of their useful life, they can no longer accept or hold a charge.
An inverter’s charging circuit is smart enough to detect when a battery cannot be charged and will shut down the charging process.
This protective feature prevents the inverter from wasting energy trying to charge a dead battery and stops the charging light from blinking.
Most inverter batteries last between three to five years depending on usage patterns, maintenance and environmental conditions.
A battery nearing the end of its life will show several warning signs before complete failure. It might drain much faster than before, fail to provide backup power for the expected duration or feel unusually hot during charging.
The inverter might display low battery warnings more frequently even after supposedly full charging cycles.
Deep discharge situations occur when a battery is drained completely and left in that state for extended periods.
This happens during long power outages when the battery exhausts itself keeping appliances running.
Deep discharge damages the battery plates and can reduce capacity permanently.
Some batteries enter a protective state after deep discharge where they refuse to accept charge until special recovery procedures are performed.
Test your battery voltage using a multimeter with the inverter disconnected. A healthy 12-volt battery should show between 12.4 and 12.7 volts when fully charged and at rest.
Readings below 11.5 volts indicate severe discharge or battery damage. For 24-volt systems, multiply these values by two.
If your battery shows critically low voltage, you can attempt to recover it by charging with an external battery charger on a low current setting.
If the battery fails to respond or cannot hold voltage above minimum levels, replacement becomes necessary.
Conclusion
An inverter charging light that refuses to blink demands immediate attention because it signals an interruption in the critical charging process that keeps your backup power system ready.
The five main causes range from simple fixes like tightening loose connections and replacing blown fuses to more complex issues like failed control boards and end-of-life batteries.
Starting with the easiest checks and working toward more involved diagnostics helps you identify and resolve the problem efficiently.
Regular maintenance including cleaning battery terminals, checking connections and monitoring battery health can prevent many of these issues before they leave you without backup power when you need it most.
causes of luminous inverter low battery problem
types of solar panels and the conditions they function best


