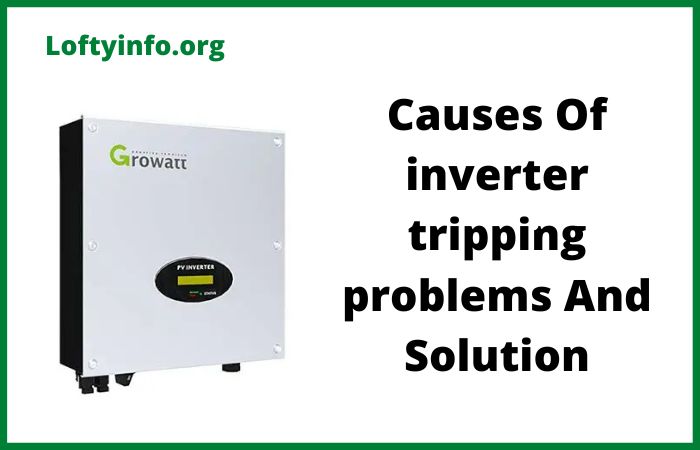
Causes Of Inverter Tripping Problems With Solutions
Inverters have become essential household appliances that provide backup power during outages.
One frustrating issue that many users face is frequent inverter tripping. When your inverter trips repeatedly, it disrupts your power supply and can indicate underlying problems that need immediate attention.
This comprehensive guide explores the most common inverter tripping problems, their causes and practical solutions to help you maintain a reliable backup power system.
Causes Of Inverter Tripping Problems
1) Battery Overload and Excessive Power Draw
One of the primary reasons inverters trip is when the connected load exceeds the inverter’s rated capacity.
Every inverter has a maximum power output rating measured in watts or VA (volt-amperes).
When you connect appliances that collectively draw more power than this rating, the inverter’s protection mechanism activates and causes it to shut down.
The root cause typically involves connecting too many high-power appliances simultaneously.
Common culprits include air conditioners, water heaters, electric kettles, microwave ovens and multiple fans running together.
Many users underestimate the cumulative power consumption of their devices and inadvertently overload the system.
To resolve this issue, start by calculating the total wattage of all connected appliances.
Check the power rating label on each device or refer to the user manual. Add up these values and compare them with your inverter’s capacity.
If the total exceeds 80 percent of your inverter’s rating, you need to reduce the load.
The troubleshooting process involves disconnecting some appliances and restarting the inverter. Prioritize essential devices like lights, fans and mobile chargers while avoiding heavy loads during power cuts.
Consider upgrading to a higher capacity inverter if your power requirements genuinely exceed your current system’s capabilities.
Avoid starting multiple appliances simultaneously as the surge current during startup can temporarily exceed the inverter’s capacity even if the running load is within limits.
2) Faulty or Deteriorated Battery Condition
A malfunctioning battery is another major cause of inverter tripping. Batteries are the heart of any inverter system and their health directly impacts overall performance.
When batteries deteriorate or develop faults, they cannot supply the required current to the inverter, triggering protective shutdowns.
Several factors contribute to battery problems. Age is a significant factor as most inverter batteries last between three to five years depending on usage and maintenance.
Over time, the internal plates corrode and the electrolyte becomes contaminated, reducing the battery’s ability to hold and deliver charge.
Low electrolyte levels expose the battery plates to air, causing sulfation and permanent damage. Loose or corroded battery terminals create high resistance connections that restrict current flow and generate excessive heat.
Addressing battery-related tripping requires systematic inspection and maintenance. Begin by checking the battery voltage using a multimeter.
A fully charged 12V battery should read between 12.6V and 13.2V. If the reading is significantly lower, the battery may be damaged or deeply discharged. Inspect the electrolyte level by looking through the battery’s translucent casing or opening the vent caps.
The electrolyte should cover the plates by at least half an inch. Top up with distilled water if needed but never use tap water as minerals can damage the battery.
Clean the battery terminals thoroughly using a wire brush to remove corrosion and ensure tight connections. Check for any physical damage like cracks, bulging or leakage.
If the battery is more than four years old and shows signs of deterioration such as rapid discharge, inability to hold charge or physical deformities, replacement is the most practical solution.
When installing a new battery, ensure it matches your inverter’s voltage and capacity specifications.
What to do when inverter shows low battery but is not charging
3) Short Circuit in Wiring or Connected Appliances
Short circuits represent a serious electrical fault that can cause immediate inverter tripping.
A short circuit occurs when the live and neutral wires touch each other directly or through a low-resistance path, creating a sudden surge of current that the inverter cannot handle.
The causes of short circuits are diverse. Damaged insulation on wiring due to age, rodent damage or physical stress can expose conductors that may touch each other.
Faulty appliances with internal short circuits can transmit the problem to the inverter. Water ingress into electrical outlets, switches or appliance housings creates conductive paths between live and neutral.
Loose connections in junction boxes or plug points can cause arcing that leads to shorts.
Identifying and fixing short circuits requires careful investigation.
Start by disconnecting all appliances from the inverter and attempting to turn it on. If the inverter operates normally with no load, the problem lies within one of the connected devices.
Reconnect appliances one at a time, waiting a few minutes between each connection. When the inverter trips, you have identified the faulty appliance which should be repaired or replaced.
If the inverter trips even with no load connected, the problem is in the house wiring. Inspect all visible wiring for damage, exposed conductors or burning marks.
Check outlets and switches for signs of arcing or melted plastic. Use a multimeter to test for continuity between live and neutral wires at various points.
The resistance should be infinite when no appliances are connected. If you detect a short circuit in the wiring but cannot locate it visually, you may need to isolate different circuits systematically or consult a qualified electrician.
Ensure all electrical connections are properly insulated and protected from moisture.
4) Inverter Overheating and Ventilation Issues
Overheating is a critical problem that triggers thermal protection mechanisms in inverters. Modern inverters include temperature sensors that shut down the system when internal temperatures exceed safe limits.
This protects the sensitive electronic components from heat damage but also interrupts your power supply.
Multiple factors contribute to inverter overheating. Inadequate ventilation is the most common cause.
Inverters generate heat during operation, particularly when powering heavy loads. If the inverter is installed in a confined space without proper airflow such as inside a closed cabinet or against a wall, heat accumulates rapidly.
Dust accumulation on cooling fins and ventilation grilles acts as an insulator that prevents heat dissipation.
Operating the inverter at or near maximum capacity for extended periods generates excessive heat.
Ambient temperature also plays a role as inverters installed in hot rooms or exposed to direct sunlight struggle to maintain safe operating temperatures.
Solving overheating problems requires improving thermal management. First, relocate the inverter if necessary to a well-ventilated area with good air circulation.
Maintain at least six inches of clearance on all sides, particularly around ventilation openings. Mount the inverter on a wall rather than placing it on the floor to improve airflow and reduce dust intake.
Clean the inverter regularly using compressed air or a soft brush to remove dust from cooling fins, vents and internal fans. Avoid using water or wet cloths as moisture can damage electronic components.
Check if the cooling fan is functioning properly. Some inverters have internal fans that activate when temperatures rise.
A faulty fan will cause rapid overheating. Reduce the connected load if you frequently run the inverter near its maximum capacity.
Consider installing the inverter in a cooler room away from direct sunlight and heat sources like kitchens or sunny walls.
If overheating persists despite these measures, the inverter’s internal components may be damaged and require professional servicing or replacement.
5) Voltage Fluctuations and Input Power Problems
Inverters are designed to operate within specific input voltage ranges. Significant deviations from these ranges cause the inverter to trip as a protective measure.
This problem is particularly relevant for the input power from the mains supply that charges the batteries and runs the inverter’s control circuits.
The primary cause is unstable grid voltage. In many areas, mains voltage fluctuates due to grid issues, transformer problems or variations in demand. When the input voltage drops too low or spikes too high, the inverter’s voltage protection circuit activates.
Loose connections in the mains input wiring can also create intermittent voltage problems. Additionally, using inadequate gauge wiring that cannot handle the charging current creates voltage drops that may trigger tripping.
Resolving voltage-related tripping starts with measuring the mains input voltage using a multimeter. For a 230V system, acceptable voltage typically ranges from 180V to 260V, though this varies by inverter model.
Check your inverter’s specifications for the exact acceptable range. If the grid voltage frequently falls outside this range, you may need an external voltage stabilizer to regulate the input power.
Inspect all connections between the mains supply and the inverter. Tighten any loose connections and replace damaged or corroded wiring.
Ensure the wire gauge is appropriate for the current draw. For inverters with significant charging current, use at least 4mm² or 6mm² wire depending on the inverter capacity. Check the main circuit breaker or MCB dedicated to the inverter circuit.
An undersized breaker may trip under normal charging loads. Verify that the earthing connection is proper and secure as poor earthing can cause voltage instability.
If voltage fluctuations are severe and frequent in your area, consider investing in a voltage stabilizer or a pure sine wave UPS system that offers better voltage regulation capabilities.
Following these comprehensive troubleshooting steps will help you identify and resolve most inverter tripping problems.
Regular maintenance including battery water level checks, terminal cleaning and ensuring proper ventilation significantly reduces tripping incidents.
If your inverter continues to trip after implementing these solutions, the unit may have internal component failures that require professional diagnosis and repair.
Always prioritize safety when working with electrical systems and do not hesitate to consult qualified technicians for complex issues.
solaredge inverter problem causes
Benefits of having an oversized solar array
Why Is Luminous Inverter Not Working After Power Cut


