Luminous Inverter 1650 Overload Problems And Solutions
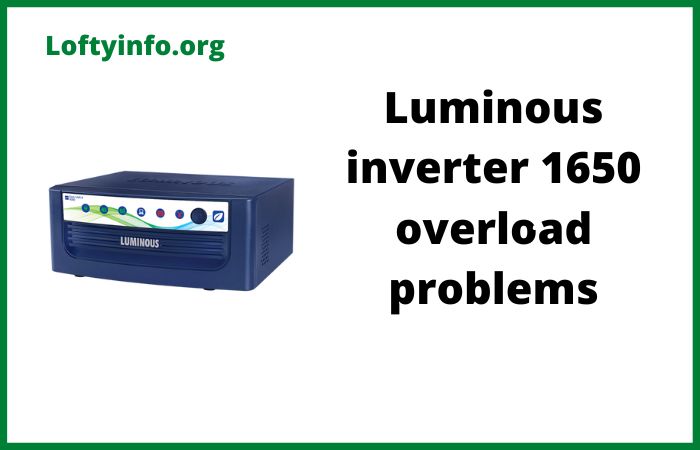
The Luminous inverter 1650 has established itself as a reliable power backup solution for homes and small offices across various regions.
This inverter model with its 1650VA capacity serves as an essential bridge during power outages. However, many users encounter overload problems that can disrupt the smooth operation of their power backup system.
Understanding these overload issues is crucial because they not only affect the performance of your inverter but can also lead to premature equipment failure and reduced battery life.
When an overload occurs, the inverter struggles to supply power to connected appliances and may shut down automatically to protect its internal circuitry.
This comprehensive guide explores the most common overload problems that affect the Luminous inverter 1650 model and provides practical solutions to help you maintain optimal performance.
Luminous Inverter 1650 Overload Problems
1) Excessive Load Beyond Inverter Capacity
One of the most frequent overload problems occurs when users connect appliances that collectively demand more power than the inverter can supply.
The Luminous 1650 model typically has a power output ranging between 900 to 1100 watts depending on the specific variant.
When the total wattage of connected devices exceeds this threshold, the inverter enters an overload state and may either beep continuously or shut down completely to prevent damage to its internal components.
This problem happens because users often underestimate the power consumption of their household appliances. Common culprits include electric irons that consume 1000 watts, microwave ovens requiring 800 to 1200 watts, water heaters drawing 1500 to 2000 watts, and air conditioners that can demand 1500 watts or more. When multiple high-power devices run simultaneously on the inverter, the cumulative load quickly surpasses the safe operating limit.
To resolve this issue, you need to calculate the total power consumption of all devices you intend to run on the inverter.
Start by checking the wattage rating printed on each appliance or in its user manual.
Create a list of essential devices you need during power cuts and add up their wattage. If the total exceeds 900 watts, you must reduce the load by disconnecting non-essential appliances.
Prioritize lighting, fans, and critical electronics while avoiding heavy-duty appliances like heaters, irons and motor-based equipment.
You can also implement a rotation system where you use high-power devices one at a time rather than simultaneously.
For permanent solutions, consider upgrading to a higher capacity inverter if your power requirements consistently exceed the 1650 model’s capabilities.
2) Faulty or Degraded Battery Performance
A deteriorating battery can trigger overload alarms even when the actual load remains within acceptable limits.
This happens because weak batteries cannot deliver the required current to the inverter, causing voltage drops that the system interprets as an overload condition.
The inverter attempts to draw more current from the failing battery to maintain output voltage but the battery’s internal resistance increases as it degrades, creating a situation where the inverter thinks it is overloaded.
Battery degradation occurs due to several factors including age, improper maintenance, irregular charging cycles and extended periods of deep discharge. Most inverter batteries have a lifespan of 3 to 5 years depending on usage patterns and maintenance.
Sulfation builds up on battery plates over time, reducing their capacity to hold and deliver charge. Low electrolyte levels in tubular batteries expose the plates to air, causing permanent damage.
Batteries lose their efficiency when subjected to extreme temperatures or when left in a discharged state for extended periods.
To troubleshoot battery-related overload problems, begin by checking the battery voltage using a multimeter.
A healthy 12V battery should read between 12.6 to 13.2 volts when fully charged and not under load.
If the voltage drops below 11.5 volts, the battery requires immediate attention. For tubular batteries, remove the top cover and inspect electrolyte levels in each cell. The liquid should cover the plates by at least half an inch.
If levels are low, top up with distilled water only. Never use tap water as minerals can damage the plates.
Clean any corrosion from battery terminals using a mixture of baking soda and water, then apply petroleum jelly to prevent future corrosion.
Test the battery under load by running your usual appliances and monitoring how quickly the voltage drops. If the battery cannot maintain voltage above 11 volts under normal load, it needs replacement.
Regular maintenance includes checking electrolyte levels monthly, cleaning terminals quarterly, and ensuring proper ventilation around the battery to dissipate heat.
3) Loose or Corroded Connection Points
Poor electrical connections create resistance in the power delivery path, which manifests as overload symptoms in the inverter.
When connections between the battery, inverter, and load become loose or corroded, they restrict current flow and generate heat.
This increased resistance forces the inverter to work harder to deliver the required power, triggering overload protection mechanisms even when the actual connected load is appropriate.
Corrosion develops at connection points due to exposure to moisture, acid fumes from batteries, and oxidation of metal contacts over time.
Loose connections occur from thermal expansion and contraction cycles, vibrations, or improper initial installation.
These issues are particularly common at battery terminals, where the combination of acid vapors and high current flow accelerates deterioration.
Wire connections at the inverter input and output terminals also suffer from loosening, especially if the original installation did not use proper torque when tightening terminal screws.
To address connection problems, start by switching off the inverter and disconnecting it from the mains power supply.
Examine all cable connections starting from the battery terminals. Look for white or greenish powder around terminals which indicates corrosion.
Remove the battery cables and clean both the terminal posts and cable clamps thoroughly using a wire brush or sandpaper until you see shiny metal.
For stubborn corrosion, make a paste of baking soda and water, apply it to the affected areas, and scrub gently.
After cleaning, reconnect the cables ensuring tight contact and apply a thin layer of petroleum jelly or specialized terminal grease to prevent future corrosion.
Check the tightness of all connections at the inverter’s input and output terminals. Use an appropriate screwdriver or wrench to ensure firm contact without over-tightening which could damage the terminals.
Inspect cable insulation for any cracks or damage and replace compromised cables immediately. Pay special attention to the grounding connection as a poor ground can cause various operational issues including false overload alarms.
Perform this inspection every three months to maintain optimal performance.
4) Defective Inverter Sensors or Control Board
Sometimes the overload problem does not stem from actual excessive load but from faulty sensors or control board issues within the inverter itself.
The inverter uses current sensors and voltage monitoring circuits to detect overload conditions.
When these components malfunction, they send incorrect signals to the control board, causing the inverter to display overload warnings or shut down even when operating under normal conditions.
Sensor failures occur due to component aging, moisture ingress into the inverter cabinet, power surges, or manufacturing defects.
The current sensing circuit might develop calibration drift over time, causing it to report higher current values than actually flowing.
Capacitors on the control board can bulge or leak, affecting the accuracy of voltage measurements. In some cases, firmware glitches in the microcontroller can cause erratic behavior.
Environmental factors like excessive heat, humidity, or dust accumulation inside the inverter cabinet accelerate component degradation and increase the likelihood of sensor malfunctions.
Diagnosing internal inverter problems requires systematic testing. First, disconnect all loads from the inverter and observe if the overload alarm persists.
If the alarm continues with no load connected, the issue lies within the inverter electronics rather than external factors.
Check the inverter display for error codes that might indicate specific faults. Many Luminous models show numeric codes that correspond to particular issues.
Consult your user manual to interpret these codes. Measure the DC voltage at the inverter input terminals while it is running.
Compare this reading with the battery voltage measured directly at the battery terminals. A significant difference suggests problems with the internal wiring or sensors. Similarly, measure the AC output voltage and frequency.
Deviations from standard 230V and 50Hz values indicate control board issues. If you notice the inverter cabinet feels excessively hot, inadequate ventilation or internal component failure might be causing the problem.
Ensure the inverter has adequate space around it for air circulation. Clean any dust accumulation from ventilation slots using compressed air or a soft brush.
For suspected sensor or control board failures, professional repair becomes necessary as these components require specialized diagnostic equipment and technical expertise.
Contact Luminous authorized service centers rather than attempting internal repairs yourself, as this could void your warranty and potentially cause more damage.
Keep your purchase receipt and warranty documents handy when seeking service.
5) Short Circuit or Ground Fault in Wiring
Hidden wiring problems in your home’s electrical system can trigger overload conditions in your Luminous inverter 1650.
A short circuit occurs when the live and neutral wires make unintended contact, creating a low-resistance path that draws excessive current.
Ground faults happen when current leaks to the earth through damaged insulation or faulty appliances.
Both conditions cause the inverter to sense abnormally high current flow and activate its overload protection.
These wiring issues develop from various sources including rodent damage to cables, deteriorated insulation in old wiring, water seepage into electrical outlets or junction boxes, and faulty appliances with internal short circuits.
Loose connections in switchboards or plug points can create intermittent short circuits that are difficult to diagnose.
Sometimes, the problem exists in the inverter’s output wiring itself rather than the house wiring.
Improper installation where wires are crushed or pinched at sharp edges can gradually wear through the insulation, creating short circuits over time.
To troubleshoot wiring-related overload problems, begin by isolating different circuits. Disconnect all devices from the inverter and remove all plugs from sockets connected to the inverter supply. Switch on the inverter and observe if the overload condition clears.
If the inverter operates normally with nothing connected, gradually reconnect devices one at a time.
When you reconnect the device or circuit that causes the overload alarm, you have identified the problem area. Inspect that particular appliance or circuit thoroughly.
Check plug points for any burning smell, discoloration or loose connections. Examine extension cords and power strips for physical damage.
Test each appliance individually by plugging it into a different power source to determine if the appliance itself is faulty.
Use a multimeter set to resistance mode to check for continuity between the live and neutral wires with all switches off and appliances disconnected.
A reading of zero or very low resistance indicates a short circuit. Similarly, test for ground faults by measuring resistance between the live wire and ground with everything disconnected.
Any reading below infinite resistance suggests current leakage. For persistent wiring problems or if you are uncomfortable working with electrical systems, hire a qualified electrician to conduct a thorough inspection.
They can use specialized tools like insulation resistance testers and thermal imaging cameras to identify hidden problems.
Repair or replace damaged sections of wiring, faulty outlets, and compromised appliances. Ensure all electrical work complies with local safety codes and standards.
Conclusion
Overload problems in the Luminous inverter 1650 can stem from multiple causes ranging from simple excessive load to complex internal failures.
By understanding each potential issue and following the systematic troubleshooting steps outlined above, you can identify and resolve most problems without professional assistance.
Regular maintenance of your battery, periodic inspection of connections, careful load management and prompt attention to unusual behavior will ensure your inverter provides reliable backup power for years.
Remember that some issues require professional intervention, and attempting repairs beyond your expertise could be dangerous or damage your equipment further.
When in doubt, always consult authorized service personnel to maintain the safety and longevity of your power backup system.
magnum RV inverter troubleshooting steps
How to correct an inverter fuse blowing frequently problem
Fixing common luminous 1250 inverter overload problems
How microtek inverter overload problems occur
How inverter overload affects performance
Luminous zelio 1100 inverter overload problems with solutions
How luminous inverter 650 overload problems happen
Bluetti ac200p problems and solutions explained
3176 cat engine complete technical specs
Luminous inverter battery charging problem
Why luminous inverter voltage fluctuation problem occur
Common Microtek inverter overcharging problems
