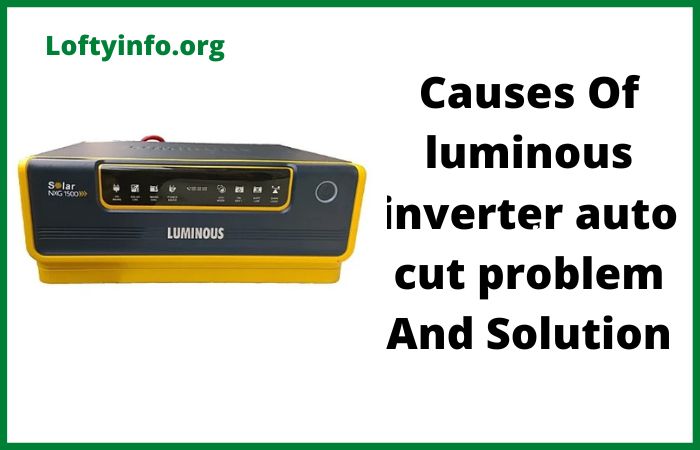
Luminous Inverter Auto Cut Problem: Causes and Solutions
Power backup systems have become essential in modern households and businesses, especially in regions experiencing frequent electricity disruptions.
Luminous inverters stand among the most trusted brands for reliable power backup solutions.
Users occasionally encounter situations where their inverter automatically shuts down or cuts off unexpectedly, disrupting the power supply when it’s needed most.
Understanding why this happens and how to resolve it can save you time, money and the frustration of unexpected power failures.
The luminous inverter auto cut problem causes and solution involves multiple factors ranging from battery issues to environmental conditions and electrical faults.
This comprehensive guide will walk you through each potential cause and provide detailed troubleshooting steps to help you restore your inverter to optimal functioning condition.
Luminous Inverter Auto Cut Problem
1) Battery-Related Issues
The battery serves as the heart of your inverter system and most automatic shutdown problems originate from battery malfunctions.
When your inverter detects abnormal battery conditions, it activates protective mechanisms that trigger an automatic cutoff to prevent damage to both the battery and the inverter itself.
Low Battery Voltage is perhaps the most common culprit.
When the battery voltage drops below the minimum threshold required for operation, typically around 10.5 to 11 volts for a 12V battery system, the inverter automatically disconnects to protect the battery from deep discharge damage.
Deep discharging significantly reduces battery lifespan and can permanently damage the cells.
To troubleshoot this issue, first check the battery voltage using a multimeter.
If the reading is below 11 volts when the battery should be fully charged, you need to investigate further.
Check whether the battery is receiving adequate charging time.
Many users make the mistake of expecting their inverter to charge a completely drained battery in just a few hours, but a deeply discharged battery may require 8 to 12 hours of continuous charging to reach full capacity.
Ensure your mains power supply is stable and consistent.
Frequent power fluctuations prevent the battery from completing its charging cycle.
If your area experiences unstable power supply, consider installing a voltage stabilizer before the inverter input.
Also inspect the battery terminals for corrosion or loose connections, as these prevent proper charging and can cause voltage drops even when the battery appears to be in good condition.
Battery Sulfation and Aging naturally occurs over time but accelerates under poor maintenance conditions.
Lead-acid batteries typically last between 3-5 years with proper care but this lifespan reduces significantly if the battery frequently undergoes deep discharge cycles or remains undercharged for extended periods.
Sulfation creates a layer of lead sulfate crystals on the battery plates, reducing the battery’s ability to hold charge.
To address this, perform a capacity test on your battery.
Fully charge the battery, then disconnect the mains power and run your regular load.
If the backup time has reduced to less than 60% of what you experienced when the battery was new, and the battery is over 3 years old, replacement is likely necessary.
Some inverters have a battery equalization mode that can help reverse minor sulfation, so check your user manual for this feature and run it monthly if available.
2) Overload Conditions
Inverters have a maximum power output rating, typically measured in VA which means Volt-Amperes or watts.
When the connected load exceeds this rating, the inverter’s protection circuit activates and shuts down the system to prevent overheating and component damage.
This represents another frequent luminous inverter auto cut problem cause and solution scenario.
Calculate your total connected load by adding up the wattage of all appliances running simultaneously on the inverter.
Remember that inductive loads like motors, pumps, and refrigerators require 2 to 3 times their rated power during startup.
If your inverter is rated for 900VA and you’re trying to run appliances totaling 1000 watts, automatic cutoff is inevitable.
The solution involves load management.
Prioritize essential appliances during power outages and avoid running high-power devices simultaneously.
If you consistently need more power than your current inverter provides, upgrading to a higher capacity model is the only permanent solution.
Create a load chart identifying which appliances are essential during power cuts and ensure their combined wattage stays within 80% of your inverter’s capacity to allow for surge currents.
3) Overheating Issues
Temperature plays a critical role in inverter performance.
These devices generate heat during operation and excessive temperature triggers thermal protection mechanisms that shut down the inverter automatically.
Poor ventilation, dusty environments and high ambient temperatures contribute to overheating problems.
Luminous inverters typically have internal temperature sensors that cut power when the internal temperature exceeds safe operating limits, usually around 50-60°C.
If your inverter is installed in a confined space, inside a cabinet or near heat-generating appliances, overheating becomes a significant concern.
Troubleshoot overheating by relocating your inverter to a well-ventilated area with at least 6 inches of clearance on all sides.
Clean the inverter’s ventilation slots and cooling fans monthly using compressed air or a soft brush to remove accumulated dust.
Ensure the installation location maintains ambient temperature below 40°C.
If you live in particularly hot regions, consider installing the inverter in the coolest part of your home, away from direct sunlight.
Check if the cooling fan is functioning properly by listening for fan noise during operation.
A silent inverter under load might indicate a failed cooling fan requiring replacement.
Some models have adjustable fan speed settings in their menu that you can modify for better cooling performance.
4) Input Voltage Problems
Unstable or inappropriate input voltage from the mains electricity supply causes inverters to shut down as a protective measure.
This issue manifests differently from battery problems because it occurs even when the battery is fully charged and the load is within acceptable limits.
Inverters operate within a specific input voltage range, typically 140-270V for Indian standards.
When the incoming voltage falls below or rises above this range, the inverter disconnects to protect its internal components.
Use a multimeter to measure your mains voltage during different times of the day, especially during peak usage hours when voltage drops are common.
If voltage fluctuations are causing your luminous inverter auto cut problem, installing an external voltage stabilizer between your mains supply and inverter input resolves this issue.
Ensure the stabilizer has adequate capacity, typically 20-30% higher than your inverter’s input rating.
Check your home’s main circuit breaker and the dedicated inverter circuit for loose connections or insufficient wire gauge, both of which can cause voltage drops under load.
5) Faulty Wiring and Connections
Electrical connections deteriorate over time due to heat, corrosion and mechanical stress.
Loose, corroded or undersized wiring creates resistance in the circuit, leading to voltage drops, heat generation and ultimately, automatic inverter shutdown.
Inspect all connection points systematically.
Start with the battery terminals, these should be clean, tight and free from white or green corrosion deposits.
Clean corroded terminals using a wire brush and baking soda solution, then apply petroleum jelly or terminal grease to prevent future corrosion.
Ensure the battery cables are appropriately sized for your system; undersized cables create resistance and voltage drops.
Check the output connections to your home’s electrical panel.
Loose connections here not only cause inverter problems but also pose fire hazards.
All connections should be tight enough that you cannot move the wire by hand.
Examine the wire insulation for signs of damage, burning or melting, which indicate overheating problems requiring immediate attention.
6) Circuit Board and Component Failures
Internal component failures, though less common, can cause automatic cutoff problems.
Capacitor failures, damaged circuit boards, faulty relays, and malfunctioning sensors all trigger protective shutdowns.
These issues typically require professional diagnosis and repair.
If you’ve systematically eliminated all the above causes and your inverter continues to shut down automatically, internal component failure is likely.
Look for visible signs like bulging or leaking capacitors, burn marks on the circuit board or unusual smells during operation.
Do not attempt to repair internal components unless you have appropriate technical expertise and the warranty has expired.
Contact Luminous authorized service centers for professional diagnosis.
Attempting unauthorized repairs typically voids your warranty and can create additional problems.
Many internal failures are covered under warranty if the inverter is relatively new, so check your warranty status before proceeding with repairs.
7) Environmental Factors
Humidity and moisture exposure significantly impact inverter performance.
Condensation inside the inverter enclosure can create short circuits and corrosion, leading to automatic shutdowns.
This problem is particularly prevalent in coastal areas, basements and regions with high humidity levels.
Install your inverter in a dry location away from water sources, bathrooms and areas prone to dampness.
If environmental humidity is unavoidable, consider using silica gel packets inside the inverter enclosure if possible or run a dehumidifier in the room.
Ensure the inverter enclosure is properly sealed to prevent moisture ingress.
Regular Maintenance Practices
Prevention is always better than cure.
Establish a monthly maintenance routine that includes checking battery water levels in tubular batteries, cleaning terminals, verifying all connections and ensuring proper ventilation.
Keep a maintenance log noting battery voltage readings, backup time and any unusual behavior.
Schedule annual professional servicing even if your inverter appears to function normally.
Technicians can identify potential problems before they cause system failures, saving you from unexpected power outages.
Regular maintenance extends both battery and inverter lifespan significantly, making it a worthwhile investment.
Understanding the luminous inverter auto cut problem causes and solution empowers you to maintain reliable power backup.
Most issues are preventable through proper installation, appropriate load management, and regular maintenance.
When problems do occur, systematic troubleshooting usually identifies the cause, allowing for targeted solutions rather than expensive part replacements.
Remember that safety should always be your priority, when in doubt about electrical repairs or diagnostics, consult qualified professionals rather than attempting complex fixes yourself.
Why inverter battery heats up when charging
What to do if you have an inverter overload short circuit problem
Best fix for true power inverter overload problems
Why luminous inverter automatic off problem occur
Understanding luminous inverter high voltage problems
Fixing luminous inverter 1650 overload problems
Common growatt inverter problems
Fixing common luminous inverter problems
Luminous inverter battery charging problem
How to charge bike battery with inverter at home
