Luminous Inverter Not Working After Power Cut Problem Causes And Solutions
Power outages are an unfortunate reality in many regions, and having a reliable inverter system is essential for maintaining electricity during these disruptions.
Luminous inverters have established themselves as dependable backup power solutions for homes and offices.
Many users encounter a frustrating scenario where their inverter fails to function properly after a power cut, leaving them without the backup power they invested in.
Understanding why your luminous inverter not working after power cut problem occurs and knowing how to address it can save you time, money and unnecessary stress.
This comprehensive guide explores the most common reasons behind inverter failures following power interruptions and provides practical troubleshooting steps and solutions to restore your system to full functionality.
Luminous Inverter Not Working After Power Cut Problem Causes And Solutions
1) Battery Connection Issues and Terminal Corrosion
One of the primary culprits behind inverter malfunction after power restoration is poor battery connectivity.
During power fluctuations or after extended outages, battery terminals can become loose, corroded or oxidized.
The white or greenish deposits that form on battery terminals create resistance, preventing proper current flow between the battery and inverter unit.
To troubleshoot this issue, first ensure the inverter is switched off and disconnect it from the mains.
Carefully inspect the battery terminals for any visible corrosion, loose connections or damaged cables.
You’ll often notice a powdery substance or discoloration around the terminal posts.
Remove the battery cables and clean the terminals thoroughly using a wire brush and a mixture of baking soda and water.
This solution neutralizes the acid causing corrosion.
After cleaning, rinse with clean water and dry completely before reconnecting.
When reattaching the cables, ensure they are tightened securely but not over-tightened, as this can damage the terminals.
Apply a thin layer of petroleum jelly or specialized battery terminal grease to prevent future corrosion.
This simple maintenance step can resolve many instances of the luminous inverter not working after power cut problem and should be performed every few months as preventive maintenance.
2) Tripped MCB or Faulty Circuit Breakers
Miniature Circuit Breakers (MCBs) are safety devices designed to protect your inverter from overloading and short circuits.
During power cuts, especially those caused by electrical faults or lightning strikes, the MCB may trip to safeguard the system.
Many users overlook this simple issue and assume their inverter has suffered a major failure.
Begin troubleshooting by locating the MCB associated with your inverter system.
This is typically found on the inverter unit itself or in your main electrical distribution board.
Check if the switch is in the “off” or tripped position.
If it has tripped, don’t immediately reset it as this could indicate an underlying problem that needs addressing first.
Before resetting the MCB, disconnect all loads from the inverter and inspect the wiring for any visible damage, exposed wires or burn marks.
If everything appears normal, reset the MCB by switching it off completely, then back on.
If the MCB trips again immediately, there’s likely a short circuit in your wiring or a faulty appliance connected to the inverter output.
Test by connecting loads one at a time to identify the problematic device.
If the MCB continues to trip without any load, the MCB itself may be faulty and require replacement by a qualified electrician.
3) Battery Deep Discharge and Low Voltage
Batteries are the heart of any inverter system, and their condition directly impacts inverter performance.
During extended power outages, batteries can become deeply discharged, falling below the minimum voltage threshold required for the inverter to operate.
Luminous inverters have built-in protection mechanisms that prevent operation when battery voltage drops too low, protecting the battery from permanent damage.
To diagnose this issue, check the inverter display panel or LED indicators.
Most Luminous models show battery voltage levels or have specific warning lights for low battery conditions.
If your inverter displays a low battery warning or shows voltage readings below 10.5V for a 12V system, the battery needs recharging before normal operation can resume.
The solution involves allowing sufficient time for the battery to recharge once mains power returns.
Depending on the battery capacity and depth of discharge, this could take 6 to 12 hours or longer.
Avoid repeatedly turning the inverter on and off during this charging period, as this interrupts the charging cycle.
If the battery refuses to charge or takes an unusually long time, it may have sulfated or reached the end of its service life.
Batteries typically last 3-5 years with proper maintenance and replacement becomes necessary when they can no longer hold adequate charge.
4) Overload Shutdown and Load Management
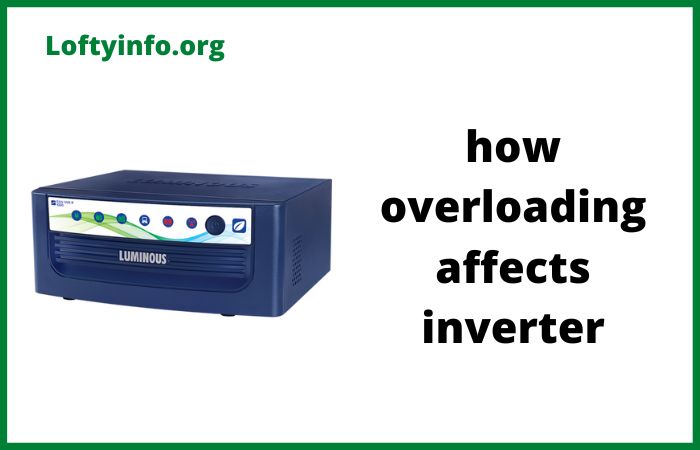
Inverters are rated for specific power capacities, and exceeding this limit triggers protective shutdown mechanisms.
After a power cut, when electricity returns, some inverters may detect an overload condition if too many appliances are connected simultaneously, particularly those with high startup currents like refrigerators, air conditioners, or motors.
Troubleshooting begins with calculating your total connected load. Check the power rating on each appliance connected to your inverter backup circuit and sum them up.
Compare this total to your inverter’s rated capacity, which is specified in VA (Volt-Amperes) or Watts.
Remember that the actual power consumption can be higher than the rated values during startup, especially for inductive loads.
If you’ve confirmed an overload situation, the solution is straightforward: reduce the connected load.
Disconnect non-essential appliances and prioritize critical devices like lights, fans and communication equipment.
Many Luminous inverters have overload indicators on their display panels.
Reset the inverter by switching it off for a few minutes, then restart with a reduced load.
For households requiring more power, consider upgrading to a higher-capacity inverter or implementing a load management strategy where heavy appliances are used alternately rather than simultaneously.
5) Faulty or Expired Batteries
Battery failure is perhaps the most common reason for the luminous inverter not working after power cut scenario.
Batteries deteriorate over time due to repeated charge-discharge cycles, improper maintenance and environmental factors.
A battery that has reached the end of its functional life may show adequate voltage when not under load but fail to deliver current when power is demanded.
To troubleshoot battery health, perform a load test.
Fully charge the battery, then disconnect it from the mains supply and observe how long it provides backup power.
If the backup time has significantly decreased compared to when the battery was new.
For instance, providing only 30 minutes instead of the usual 3 to 4 hours the battery has likely degraded.
Also check for physical signs of battery failure: swelling or bulging case, leaking electrolyte or unusual heating during charging.
Battery-specific indicators include consistently low specific gravity readings in the electrolyte (for conventional batteries), which you can measure using a hydrometer.
Readings below 1.200 across multiple cells indicate poor battery condition.
For maintenance-free batteries, check if the indicator window shows red or clear instead of green.
The only effective solution for a failed battery is replacement.
When replacing batteries, always use the type and capacity recommended by Luminous for your specific inverter model.
Install batteries in a well-ventilated area away from direct sunlight and heat sources.
Proper installation and regular maintenance of the new battery will ensure optimal lifespan and reliable performance during future power outages.
6) Internal Inverter Faults and Electronic Component Failure
While less common than battery or connection issues, internal inverter failures can occur due to power surges, manufacturing defects or age-related component degradation.
These problems typically require professional intervention but understanding the symptoms helps you determine when to call for technical support.
Troubleshooting internal faults begins with observation.
Listen for unusual sounds like continuous beeping, clicking or humming from the inverter unit.
Check for error codes displayed on the panel.
Luminous inverters show specific codes corresponding to different fault conditions.
Consult your user manual to decode these messages.
Common internal faults include charging circuit failures, inverter circuit malfunctions or microcontroller issues.
You can perform basic troubleshooting by executing a complete system reset.
Switch off the inverter, disconnect it from both the mains and battery, and leave it for 10 to 15 minutes.
This allows capacitors to discharge fully and can sometimes clear minor electronic glitches.
Reconnect following the proper sequence: first the battery, then the mains input.
If the problem persists after reset, especially if accompanied by burning smells, smoke or visible damage to internal components, do not attempt DIY repairs.
Modern inverters contain complex electronics and high voltages that require specialized knowledge and tools.
Contact Luminous authorized service centers for diagnosis and repair.
Attempting unauthorized repairs not only risks personal safety but also voids warranty coverage.
Conclusion
Understanding the common causes of luminous inverter not working after power cut situations empowers you to quickly diagnose and often resolve issues without professional help.
Regular maintenance including cleaning battery terminals, checking connections, monitoring battery health and ensuring proper load management prevents many problems before they occur.
Recognizing when professional assistance is needed particularly for internal electronic failures or when dealing with components under warranty.
By following the troubleshooting steps outlined in this guide, you can maximize your inverter’s reliability and ensure uninterrupted backup power when you need it most.
Remember that preventive maintenance is always more cost-effective than emergency repairs so incorporate these inspection routines into your regular home maintenance schedule.


