Luminous Inverter Troubleshooting For Common Problems
Power outages can be incredibly frustrating, especially when you rely on your inverter to keep essential appliances running.
Luminous inverters are among the most trusted backup power solutions in homes and offices, known for their reliability and performance.
Like any electrical equipment, they can occasionally encounter issues that disrupt their operation.
Understanding how to identify and resolve these problems can save you time, money and the inconvenience of prolonged power disruptions.
This comprehensive guide will walk you through common issues and practical solutions for luminous inverter troubleshooting, helping you restore power quickly and efficiently.
Luminous Inverter Troubleshooting For Common Problems
1) Inverter Not Turning On
One of the most common problems users face is when their inverter simply refuses to turn on.
This can be alarming, but the solution is often straightforward.
Begin by checking if the inverter is receiving power from the main supply.
Examine the main switch and ensure it’s in the ON position.
Sometimes, circuit breakers trip due to power fluctuations, so inspect your distribution board for any tripped breakers and reset them if necessary.
Next, verify all cable connections between the inverter, battery and main supply.
Loose or corroded connections can prevent the unit from powering up.
Tighten any loose terminals and clean corroded contacts with a wire brush or sandpaper.
If the display panel remains blank despite proper connections, the internal fuse might have blown.
Most Luminous inverters have accessible fuses that can be replaced easily.
If you’re uncomfortable working with electrical components, it’s best to contact a qualified technician.
2) Battery Not Charging
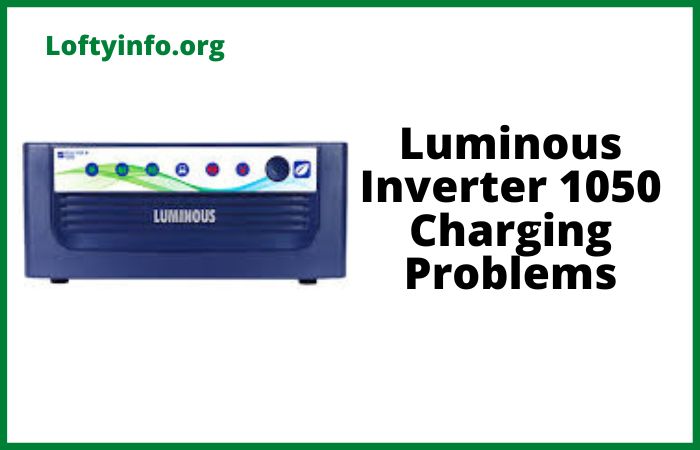
A non-charging battery is another frequent issue that requires attention during luminous inverter troubleshooting.
If you notice that your battery isn’t charging even when mains power is available, start by checking the battery connections.
Remove the terminals, clean them thoroughly to remove any oxidation or sulfation and reconnect them securely.
Poor connections are often the culprit behind charging failures.
Examine the battery water level if you have a tubular or lead-acid battery.
Low electrolyte levels prevent proper charging and can permanently damage the battery.
Top up each cell with distilled water until the plates are adequately covered but avoid overfilling.
The water level should be between the minimum and maximum markers.
Check if the charging mode is activated on your inverter.
Some models require manual switching between UPS mode and charging mode.
Refer to your user manual for specific instructions on your model.
Verify that the input voltage from the mains supply is within the acceptable range.
Extremely low voltage can prevent the charging process from initiating.
If the voltage is consistently low in your area, consider installing a voltage stabilizer.
3) Continuous Beeping Sound
A persistent beeping sound from your inverter indicates an alert condition that needs immediate attention.
The most common cause is battery overload, which occurs when connected appliances draw more power than the inverter or battery can supply.
Calculate the total wattage of all connected devices and compare it with your inverter’s capacity.
Disconnect high-power appliances like air conditioners, water heaters or washing machines, and the beeping should stop.
Low battery voltage also triggers beeping alerts.
If your battery is old or hasn’t been properly maintained, it may not hold sufficient charge. Check the battery voltage using a multimeter.
A healthy 12V battery should read between 12.5V to 13V when fully charged.
If the reading is significantly lower, the battery may need replacement.
Overheating can cause continuous alarms as well.
Ensure your inverter is installed in a well-ventilated area away from direct sunlight and heat sources.
Clean any dust or debris from the ventilation slots using a soft brush or compressed air.
If the ambient temperature is high, consider improving room ventilation or relocating the inverter to a cooler spot.
4) Display Showing Error Codes
Modern Luminous inverters feature digital displays that show error codes to help diagnose specific problems.
Common codes include battery errors, overload warnings, and short circuit alerts.
When troubleshooting inverter issues based on error codes, always consult your user manual for the exact meaning of each code, as they vary between models.
For battery-related error codes, check the battery age and condition.
Batteries typically last three to five years depending on usage and maintenance.
If your battery is approaching this age and showing error codes, replacement might be necessary.
Also verify that the battery type setting in the inverter matches your actual battery.
Using the wrong setting can cause false error messages and improper charging.
Overload error codes require you to reduce the connected load immediately.
Identify which appliances are essential and disconnect others until the error clears.
Short circuit errors are more serious and usually indicate wiring problems or faulty appliances.
Disconnect all loads and check each circuit carefully for exposed wires or damaged insulation.
5) Reduced Backup Time
Experiencing shorter backup time than usual is a gradual problem that often goes unnoticed until it becomes critical.
This issue during luminous inverter troubleshooting typically points to battery degradation.
As batteries age, their capacity to store energy diminishes, resulting in reduced runtime.
Test your battery’s health by noting how long it powers your usual load compared to when it was new.
Sulfation buildup on battery plates significantly reduces capacity in lead-acid batteries.
This occurs when batteries are left in a discharged state for extended periods.
Regular charging cycles and proper maintenance can prevent sulfation.
For existing sulfation, some specialized chargers can help restore capacity, though severely sulfated batteries may need replacement.
Check if you’ve added new appliances to your load recently.
Additional power consumption naturally reduces backup time. Recalculate your power requirements and ensure they align with your battery capacity.
Also ensure that the battery is receiving adequate charging time.
Frequent power cuts that don’t allow complete charging cycles can leave your battery partially charged, reducing available backup.
6) Inverter Switching Off Automatically
Unexpected shutdowns can disrupt important work and damage sensitive electronics.
Automatic shutdown usually occurs due to protection mechanisms triggered by abnormal conditions.
The thermal protection feature activates when the inverter overheats.
Check if the cooling fans are working properly.
Listen for fan noise when the inverter is running under load.
Silent fans may indicate motor failure or disconnected power supply to the fan.
Examine the battery terminals for heating.
Loose connections create resistance, generating heat that can trigger protective shutdowns.
Tighten all terminals and ensure proper contact.
If specific terminals or cables feel unusually hot, they may be undersized for your system’s current draw and should be replaced with appropriately rated cables.
Low input voltage from the mains supply can also cause shutdowns.
If your area experiences frequent voltage fluctuations, the inverter may shut down to protect itself and the battery from damage.
Installing an automatic voltage regulator upstream of the inverter can resolve this issue.
7) No Output Despite Battery Charge
Sometimes, despite having a fully charged battery and the inverter appearing to function normally, there’s no power output to connected appliances.
This situation requires systematic checking of the output circuit.
First, verify that the inverter is actually in inverter mode and not just in charging mode.
Some models have distinct modes that need manual switching.
Check the output circuit breaker or MCB in your inverter.
These safety devices trip when they detect faults and need to be reset manually.
Locate the output breaker, usually on the inverter panel, and ensure it’s in the ON position.
If it trips immediately after resetting, there’s likely a short circuit in your wiring or a faulty appliance connected to the inverter output.
Inspect the output wiring from the inverter to your distribution board.
Loose connections, damaged cables or burnt terminals can interrupt power supply.
Ensure all connections are tight and cables show no signs of damage.
If everything appears normal but there’s still no output, the inverter’s internal components like MOSFETs or transformers might have failed, requiring professional repair.
Preventive Maintenance Tips
Regular maintenance significantly reduces the frequency of issues requiring troubleshooting inverter systems.
Establish a monthly routine to inspect battery water levels, clean terminals and check all connections.
Keep the inverter and battery area clean and dust-free.
Dust accumulation can cause overheating and interfere with electrical connections.
Perform quarterly load tests to ensure your system can handle your power requirements.
This involves running the inverter on battery power and monitoring how long it sustains your typical load.
Any significant deviation from expected performance indicates developing problems that can be addressed before they become critical.
Annual professional servicing is highly recommended, especially for systems that are heavily used.
Technicians can perform detailed diagnostics, check internal components, test battery health accurately and identify potential issues before they cause failures.
They can also update firmware if your inverter model supports it, improving performance and adding new features.
Understanding these common issues and solutions empowers you to maintain your Luminous inverter effectively and resolve minor problems independently.
Always prioritize safety.
If you encounter issues involving exposed wiring, burning smells or problems you don’t understand, immediately disconnect the system and consult a qualified electrician or authorized Luminous service center.
Proper care and timely intervention will ensure your inverter provides reliable backup power for years to come.
Causes of goodwe inverter problems
Lg inverter direct drive washer troubleshooting guide
Xantrex inverter troubleshooting for common problems
Luminous eco volt 1050 troubleshooting guide
How to take care of inverter battery
Why inverters connected to grid damage easily and frequently

