Magnum Dimensions CSW1012 Troubleshooting: Best Repair Methods
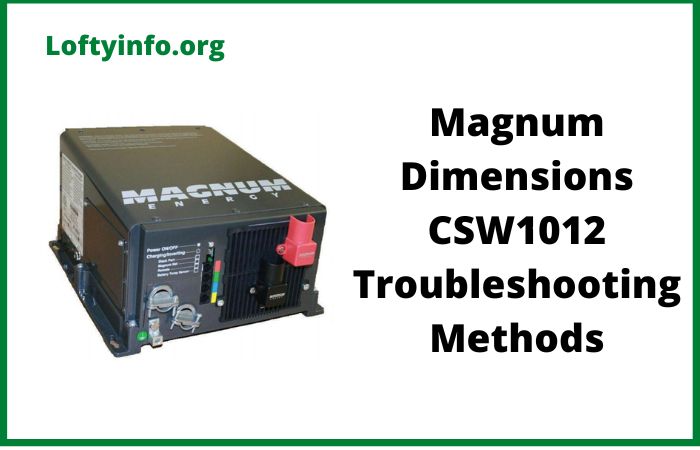
The Magnum Dimensions CSW1012 pure sine wave inverter is a reliable 1000-watt power inverter commonly used in RVs, boats and off-grid applications.
Like all electronic equipment, it can experience issues over time.
This comprehensive troubleshooting guide will walk you through detailed methods to diagnose and fix common CSW1012 problems, helping you restore power and avoid costly repairs.
Understanding Your CSW1012 Inverter
Before diving into troubleshooting methods, it’s essential to understand how your CSW1012 operates.
This 12-volt pure sine wave inverter converts DC battery power into clean AC power suitable for sensitive electronics.
The unit features built-in protection systems that monitor input voltage, output load and internal temperature to prevent damage.
Magnum Dimensions CSW1012 Troubleshooting Methods
Method 1: Error Code Diagnosis and Resolution
Understanding CSW1012 Error Codes
The CSW1012’s digital display shows specific error codes when problems occur.
Understanding these codes is crucial for effective troubleshooting.
Common Error Codes:
- E01: Low input voltage (below 10.5 VDC) – Unit shuts down in 30 seconds
- E02: High input voltage detected – Immediate shutdown for protection
- E03: Output overload or short circuit detected
- E04: Internal overtemperature condition
- E05: Internal fault detected
Step-by-Step Error Code Troubleshooting:
- Document the Error Code: Write down the exact code displayed before the unit shuts down
- Check Power Source: For E01 errors, verify battery voltage using a multimeter
- Inspect Connections: Loose or corroded DC connections often cause voltage-related errors
- Load Assessment: For E03 errors, disconnect all AC loads and attempt restart
- Cooling Check: E04 errors require checking ventilation and internal fan operation
Pro Tip: If you see an unusual display like a lowercase ‘u’, this may indicate a more serious internal fault requiring professional service.
Method 2: Power Supply and Battery Connection Troubleshooting
Diagnosing DC Input Problems
Power supply issues are among the most common CSW1012 problems.
The inverter requires stable 12V DC input to function properly.
Systematic Power Supply Diagnosis:
- Voltage Measurement at Source: Test battery voltage directly at the battery terminals.
A healthy 12V system should read 12.6-12.8V when fully charged and not under load.
- Connection Point Testing: Measure voltage at the inverter’s DC input terminals.
Significant voltage drop (more than 0.5V) between battery and inverter indicates connection problems.
- Fuse and Breaker Inspection: Locate and inspect the main DC fuse (typically 125-150 amp).
Even if not blown, fuses can develop high resistance over time, causing voltage drops under load.
- Cable Size Verification: Undersized DC cables cause voltage drops. The CSW1012 requires minimum 4/0 AWG cables for runs up to 5 feet, larger for longer distances.
Connection Improvement Steps:
- Clean all battery terminals with baking soda solution
- Apply dielectric grease to prevent corrosion
- Ensure all connections are torqued to manufacturer specifications
- Replace any corroded or damaged cables immediately
Method 3: Remote Control and Switch Troubleshooting
Diagnosing Remote Control Issues
The CSW1012 can be controlled via remote switches or panels.
Remote control problems can prevent the inverter from powering on even when the unit itself is functional.
Remote Control Diagnostic Process:
- Bypass Test: Disconnect the remote control cable and attempt to power the inverter using its front panel switch.
If the inverter works without the remote, the problem lies in the remote circuit.
- Remote Circuit Fuse Check: Locate the small fuse in the remote circuit (usually 1-3 amp).
This fuse protects the low-voltage control circuit and can fail without affecting the main DC fuse.
- Switch Contact Testing: Use a multimeter to test continuity across the remote switch contacts.
A faulty switch may show intermittent or no continuity.
- Wiring Integrity: Inspect the remote control wiring for damage, particularly at connection points and where wires pass through walls or panels.
Remote Control Solutions:
- Replace blown remote circuit fuses with identical rating
- Clean switch contacts with electronic contact cleaner
- Repair or replace damaged control wiring
- Ensure proper polarity on remote connections
Method 4: Overload Protection and Load Management
Understanding and Resolving Overload Conditions
The CSW1012 has sophisticated overload protection that can trip even when loads appear to be within specifications.
Comprehensive Overload Analysis:
- True Load Calculation: Many devices have higher startup currents than their running ratings.
For example, a refrigerator compressor may draw 3x its running current during startup.
- Load Sequencing: Instead of starting all devices simultaneously, implement a startup sequence.
Power on the inverter first, then add loads gradually.
- Inrush Current Consideration: Devices with transformers or motors create inrush currents that can trigger E03 errors.
This includes battery chargers, power tools and appliances with switching power supplies.
- Load Quality Assessment: Poor quality or damaged appliances can create abnormal load patterns that trigger protection circuits.
Load Management Strategies:
- Use a Kill-A-Watt meter to measure actual device consumption
- Install soft-start modules for high-inrush devices
- Prioritize loads and use load management systems
- Consider upgrading to a higher capacity inverter if loads consistently exceed 80% of rated capacity
Method 5: Ground Fault and Wiring Troubleshooting
Identifying and Resolving Ground Faults
Ground faults can cause the CSW1012 to shut down or fail to start, particularly in mobile installations where wiring is subject to vibration and environmental stress.
Ground Fault Diagnostic Approach:
- Visual Inspection: Examine all AC wiring for damage, particularly where wires contact metal surfaces or pass through walls.
Look for worn insulation, pinched wires or signs of moisture intrusion.
- Insulation Testing: Use a megohm meter to test insulation resistance between hot, neutral and ground conductors.
Readings below 1 megohm indicate potential problems.
- GFCI Testing: If your installation includes GFCI outlets, test them regularly.
Faulty GFCIs can cause nuisance tripping and may not provide proper protection.
- Grounding System Verification: Ensure the inverter is properly grounded to the DC negative system and that all AC equipment grounds are connected to the inverter’s ground terminal.
Ground Fault Solutions:
- Replace damaged wiring immediately
- Install additional strain relief at wire entry points
- Use marine-grade wiring in high-moisture environments
- Ensure proper bonding between AC and DC ground systems
Method 6: Temperature and Ventilation Management
Preventing Thermal Shutdowns
The CSW1012 generates significant heat during operation and relies on proper ventilation to maintain safe operating temperatures.
Thermal Management Assessment:
- Ambient Temperature Monitoring: The CSW1012 is rated for operation up to 40°C (104°F) ambient temperature.
Higher temperatures reduce capacity and can trigger thermal shutdowns.
- Ventilation Evaluation: The inverter requires minimum 3-inch clearance on all sides for proper airflow.
Restricted ventilation quickly leads to overheating.
- Internal Fan Operation: The CSW1012 has a temperature-controlled internal fan. Listen for fan operation during high-load conditions.
Fan failure leads to rapid overheating.
- Heat Sink Inspection: Dust accumulation on heat sinks reduces cooling efficiency.
Regular cleaning is essential for proper operation.
Thermal Protection Strategies:
- Install additional ventilation fans in the inverter compartment
- Use temperature-controlled exhaust fans for automatic cooling
- Clean heat sinks and internal components annually
- Consider relocating the inverter to a cooler location if thermal issues persist
Method 7: Internal Component and Fuse Diagnosis
Accessing and Testing Internal Components
Some CSW1012 problems require inspection of internal components.
This should only be attempted by qualified technicians due to high voltage hazards.
Internal Diagnostic Procedures:
- Power Down Protocol: Ensure the inverter is completely powered down and disconnected from all power sources before opening the case.
High voltage can persist in capacitors even after power removal.
- Internal Fuse Inspection: The CSW1012 contains multiple internal fuses protecting various circuits.
These may not be accessible without disassembly but blown internal fuses often result in complete unit failure.
- Capacitor Testing: Large electrolytic capacitors can fail over time, causing poor regulation or failure to start.
Visual inspection may reveal bulging or leaking capacitors.
- Relay and Contactor Testing: Internal relays control various functions.
Clicking sounds without proper operation may indicate relay failure.
Safety Considerations:
- Never work on live circuits
- Use proper lockout/tagout procedures
- Discharge capacitors before testing
- Consider professional service for internal repairs to maintain warranty coverage
Method 8: Firmware and Reset Procedures
Software-Related Troubleshooting
Modern inverters like the CSW1012 contain sophisticated control software that can occasionally require reset or update procedures.
Software Troubleshooting Steps:
- Complete Power Cycle: Disconnect all power sources (DC and AC) for at least 5 minutes to allow complete system reset.
This clears temporary faults and resets the control processor.
- Factory Reset Procedure: Some CSW1012 units support factory reset through specific button combinations.
Consult your manual for model-specific procedures.
- Configuration Verification: Ensure all settings match your installation requirements. Incorrect voltage settings or protection levels can cause operational issues.
- Parameter Reset: If the unit has been modified or reprogrammed, returning to factory default settings often resolves unexplained behavior.
Reset Protocol:
- Document current settings before performing resets
- Follow manufacturer procedures exactly
- Allow full initialization time after reset
- Test all functions systematically after reset completion
Preventive Maintenance for Long-Term Reliability
Establishing a Maintenance Schedule
Regular maintenance significantly extends CSW1012 life and prevents many common problems.
Monthly Checks:
- Verify DC voltage at inverter terminals
- Test remote controls and switches
- Check for signs of overheating or unusual noises
- Clean ventilation areas and filters
Quarterly Maintenance:
- Torque all electrical connections
- Test all protection systems
- Inspect wiring for damage or wear
- Clean internal components if accessible
Annual Service:
- Professional inspection and testing
- Capacitor and component evaluation
- Firmware updates if available
- Complete system performance verification
When to Seek Professional Help
While many CSW1012 problems can be resolved through systematic troubleshooting, some issues require professional attention:
- Internal component failures requiring specialized tools
- Warranty repairs to avoid voiding coverage
- Complex ground fault issues in large installations
- Recurring problems despite proper troubleshooting
- Safety concerns with high-voltage circuits
Conclusion: Mastering CSW1012 Troubleshooting
The Magnum Dimensions CSW1012 is a robust inverter that provides reliable service when properly maintained and troubleshot.
By following these 8 comprehensive troubleshooting methods, you can diagnose and resolve most common issues, saving time and money while maintaining optimal performance.
Remember that electrical troubleshooting requires patience and systematic approach. Always prioritize safety, document your findings and don’t hesitate to seek professional help when needed. With proper care and maintenance, your CSW1012 can provide many years of reliable power conversion service.
Key Takeaways:
- Error codes provide valuable diagnostic information
- Power supply issues are the most common problems
- Proper ventilation is critical for reliable operation
- Regular maintenance prevents most failures
- Safety should always be the top priority
By mastering these troubleshooting techniques, you’ll be well-equipped to maintain your CSW1012 inverter and ensure continuous, reliable power for all your electrical needs.
How to charge mobile phones with solar panel
The benefits of solar panels on homes
