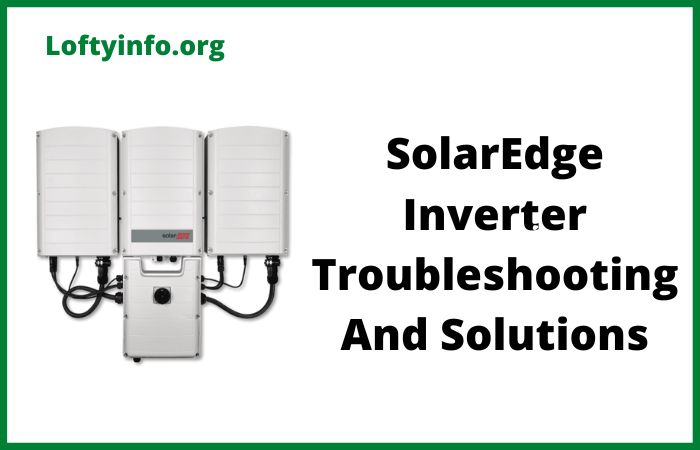
SolarEdge Inverter Troubleshooting For Common Problems
Solar energy systems have become increasingly popular as homeowners and businesses seek sustainable power solutions.
SolarEdge inverters are among the most reliable components in modern solar installations but like any electronic equipment they can experience issues that affect performance.
Understanding how to identify and resolve these problems ensures your solar system operates at peak efficiency and continues generating clean energy for your property.
SolarEdge Inverter Troubleshooting For Common Problems
1) No Power Production or Zero Output
One of the most concerning issues solar system owners face is when their SolarEdge inverter stops producing power entirely.
This problem manifests as zero watts shown on your monitoring app or display screen despite adequate sunlight conditions.
The system appears completely dormant and your electricity bills may suddenly spike as you draw more power from the grid.
The root causes of zero power output vary considerably.
A tripped circuit breaker or blown fuse in your electrical panel can cut power supply to the inverter. Grid issues such as utility company maintenance or localized power outages trigger the inverter’s safety shutdown mechanism.
Faulty DC connections between solar panels and the inverter prevent electricity flow. Internal component failures including damaged circuit boards or failed capacitors can render the unit inoperative.
Communication errors between the inverter and power optimizers attached to individual panels also halt production.
Start troubleshooting by checking your home’s electrical panel for tripped breakers or blown fuses connected to the solar system.
Reset any tripped breakers and replace blown fuses with the correct amperage rating. Verify grid power availability by checking if your neighbors have electricity and contacting your utility provider about known outages.
Inspect all DC cable connections from the solar array to the inverter looking for loose wiring or corroded terminals.
Tighten any loose connections and clean corroded contacts with appropriate electrical contact cleaner.
Examine the inverter display or monitoring app for specific error codes that pinpoint the malfunction.
If the inverter shows no signs of life after these checks the internal power supply may have failed requiring professional repair or unit replacement.
Always perform a complete system restart by switching off the DC disconnect then the AC breaker waiting three minutes and powering the system back on in reverse order.
2) Communication Failure with Monitoring Platform
Communication failures between your SolarEdge inverter and the monitoring platform prevent you from tracking system performance remotely.
The monitoring portal may show your inverter as offline or display a last communication timestamp from hours or days ago.
This issue leaves you blind to your system’s production data and unable to identify performance problems until they become severe.
Several factors contribute to communication failures. Weak or unstable wifi signals result when the inverter is located far from your router or physical barriers block the wireless connection.
Incorrect network credentials stored in the inverter settings prevent authentication with your home network. Internet service provider outages or router malfunctions disrupt the connection pathway.
Firmware bugs in older inverter software versions create compatibility issues with modern networking protocols.
Server-side problems at SolarEdge’s data centers though rare can temporarily disable monitoring access for all users.
Begin by checking your home internet connection on other devices to confirm your network is functioning properly.
Move closer to the inverter location and test wifi signal strength using your smartphone’s wifi analyzer app. Signal strength below 60 percent typically causes connection instability.
If the signal is weak consider installing a wifi range extender between your router and inverter or upgrading to a mesh network system.
Access the inverter’s display menu and navigate to communication settings to verify the wifi network name and password are entered correctly. Update these credentials if you recently changed your router password.
Check for available firmware updates through the monitoring platform or SolarEdge’s website as newer versions often resolve communication bugs.
Power cycle your home router by unplugging it for 30 seconds before reconnecting to refresh network connections.
For inverters using cellular communication verify that the SIM card is properly seated and that you have adequate cellular signal strength in the installation area.
Contact SolarEdge technical support if communication remains unavailable after exhausting these steps as they can verify server status and remotely diagnose connection issues.
3) Inverter Overheating and Thermal Shutdown
Thermal shutdowns occur when your SolarEdge inverter’s internal temperature exceeds safe operating limits causing the unit to automatically power down for protection.
The inverter display typically shows a high temperature warning or error code and production drops to zero until the unit cools sufficiently.
These shutdowns often happen during peak afternoon hours when ambient temperatures are highest and solar production should be at maximum levels.
Overheating stems from multiple sources. Direct sunlight exposure on the inverter enclosure dramatically increases internal temperatures especially on units with dark-colored housings.
Inadequate ventilation around the inverter prevents heat dissipation through natural convection.
Accumulated dust dirt and debris on cooling vents and internal components act as insulation trapping heat inside.
Failed cooling fans in larger inverter models eliminate active heat removal. High ambient temperatures in installation locations like unventilated garages or attics compound thermal stress.
Electronic component degradation over time increases power consumption and waste heat generation.
Relocate inverters installed in direct sunlight to shaded areas or install a protective sunshade above the unit while maintaining clearance for airflow.
Ensure minimum clearance requirements are met with at least six inches of space on all sides for natural convection cooling.
Remove any storage items boxes or equipment placed too close to the inverter that might restrict airflow. Clean external cooling vents using compressed air or a soft brush to remove dust and debris buildup.
For models with cooling fans listen for abnormal noise or silence indicating fan failure and arrange for fan replacement through a qualified technician.
Improve ambient cooling in hot installation locations by adding ventilation fans opening windows or relocating the inverter to a cooler area of the property.
Schedule regular maintenance cleanings every six months in dusty environments to prevent thermal performance degradation.
Monitor inverter operating temperature through the SolarEdge monitoring platform to identify developing thermal issues before they cause shutdowns.
Consider thermal derating where the inverter automatically reduces power output to manage heat in consistently hot environments as normal protective behavior rather than a fault requiring intervention.
4) Power Optimizer Communication Errors
SolarEdge systems rely on power optimizers attached to each solar panel to maximize energy harvest and enable panel-level monitoring.
Communication errors between these optimizers and the central inverter create production losses and monitoring blind spots.
The system may report missing optimizers show reduced power output from specific panels or display optimizer-related error codes on the inverter screen.
Communication problems arise from various conditions.
Physical damage to optimizer units from severe weather impacts tools dropped during roof work or animal interference disrupts their operation.
Loose or corroded DC wiring connections between panels and optimizers or between optimizers and the inverter interrupt data signals.
Water ingress into optimizer housings from damaged seals or improper installation causes short circuits and component failures.
Firmware mismatches between optimizers and the inverter create protocol incompatibilities.
Electrical noise from nearby radio transmitters or other solar systems on adjacent properties can interfere with the proprietary communication protocol.
Power surges from lightning strikes or grid events may damage optimizer electronics.
Identify which specific optimizers are experiencing communication issues using the SolarEdge monitoring platform’s panel-level display.
Note the optimizer serial numbers and panel locations showing errors or zero production. Conduct a visual inspection of problem optimizers looking for obvious physical damage burned components or disconnected wiring.
Check all DC connector terminals for tightness and corrosion paying special attention to connections at the problem optimizers.
Clean any corroded contacts and apply dielectric grease to prevent future corrosion.
Examine optimizer housing seals for cracks or gaps that might allow water entry and reseal using appropriate weatherproof sealant if needed.
Verify that all optimizers and the inverter are running compatible firmware versions through the monitoring platform.
Update optimizer firmware remotely through the SolarEdge platform if mismatches are detected following the manufacturer’s update procedures.
For persistent communication errors with specific optimizers despite good physical connections consider optimizer replacement as internal component failure may have occurred.
Document error patterns such as errors occurring only during specific weather conditions or times of day to help technicians diagnose intermittent issues.
Reset the entire system by shutting down DC and AC power waiting five minutes and restarting to re-establish communication handshakes between all devices.
5) Ground Fault and Isolation Resistance Errors
Ground fault errors represent serious electrical safety issues that SolarEdge inverters detect through continuous monitoring of isolation resistance between the DC circuit and earth ground.
When isolation resistance drops below safe thresholds the inverter displays ground fault warnings or isolation resistance errors and shuts down to prevent electric shock hazards and potential fire risks.
These faults must be addressed immediately before resuming system operation.
Ground faults develop through several mechanisms. Damaged solar panel glass or backsheet materials expose electrically live components to moisture creating current leakage paths to the metal frame and ground.
Degraded cable insulation from UV exposure animal chewing or installation damage allows conductors to contact grounded metal conduit or mounting structures.
Water pooling in junction boxes combiner boxes or conduit runs creates conductive bridges between circuits and ground. Corroded connectors develop carbon tracking that provides low-resistance fault paths.
Manufacturing defects in panels optimizers or inverters though rare can cause internal insulation breakdown.
Improper system grounding or bonding creates measurement errors that trigger false ground fault alarms.
Safety is paramount when investigating ground faults. Never attempt to troubleshoot energized circuits and always shut down the DC disconnect and AC breaker before inspection.
Begin by isolating sections of your array to identify the fault location. Disconnect strings or sub-arrays and measure isolation resistance with a specialized megohmmeter testing between positive and negative conductors tied together and the grounding system.
Isolation resistance should exceed 1 megohm under dry conditions for healthy circuits.
Systematically narrow down the fault location by testing progressively smaller array sections. Inspect all panels in the suspect section for visible damage including cracks discoloration or burn marks.
Check inside all junction boxes and combiner boxes for water accumulation corrosion or damaged wire insulation.
Examine all cable runs for physical damage and test cable insulation integrity with a megohmmeter.
Once the faulty component is identified replace damaged panels cables or connectors with new components meeting electrical code requirements.
Verify proper system grounding by confirming continuous low-resistance bonding from all metal components to the grounding electrode system.
After repairs, retest isolation resistance with all components disconnected to confirm readings exceed minimum safe values before reconnecting and re-energizing the system.
Document all measurements and repairs for your records and future reference.
Engage a licensed electrician or certified solar technician if you lack the proper tools expertise or comfort level to safely diagnose ground faults as these issues present legitimate safety hazards requiring professional attention.
Role of LVD in battery performance
What to do when Inverter shows low battery frequently
Lg inverter direct drive washer troubleshooting guide
How xantrex inverter troubleshooting for common problems happens
Luminous inverter troubleshooting for common problems
Luminous eco volt 1050 troubleshooting guide
Magnum inverter ms2812 troubleshooting guide
